

Introduction
There are many ways to deploy a Kubernetes Cluster, for example, kops, kubeadm, RKE, EKS and minikube. But all those deployment tools often involve tones of configuration files and can only be deployed via a command line interface.
There is, in fact an easier way of deploying Kubernetes Cluster using a more GUI friendly tool called Rancher. Rancher is an open-sourced multi-cluster Kubernetes management software that provides a web interface in deploying and managing Kubernetes clusters.
Deploy Rancher
Before we can start creating a Kubernetes Cluster, we first need to deploy Rancher. For demo purpose, we just need to create a single Rancher node. In production, however, it’s recommended to deploy at least 3 Rancher nodes to achieve High Availability (Yes, Rancher does support it).
Login to Amazon EC2 and create a T3 medium Ubuntu 18.04 VM. Make sure you leave port 80 and 443 open so that we can access its web interface later. Install docker, and run the following command to install Rancher.
docker run -d --restart=unless-stopped \
    -v /opt/rancher:/var/lib/rancher
    -p 80:80 -p 443:443 \
    rancher/rancher:latest \
    --acme-domain <REPLACE YOUR DOMAIN NAME>
Rancher has build-in supports for Let’s Encrypt. We can point our domain to the Rancher VM and let Rancher request a Let’s Encrypt HTTPS Certificate for us.
If you prefer using your own certificate, just remove the last line of the above command. (See Rancher Documentation for more installation configurations)
Rancher Web UI
One Rancher is ready, we can then access Rancher’s web UI by accessing our domain. After setting up the admin password, we can go ahead and start deploying a Kubernetes cluster.

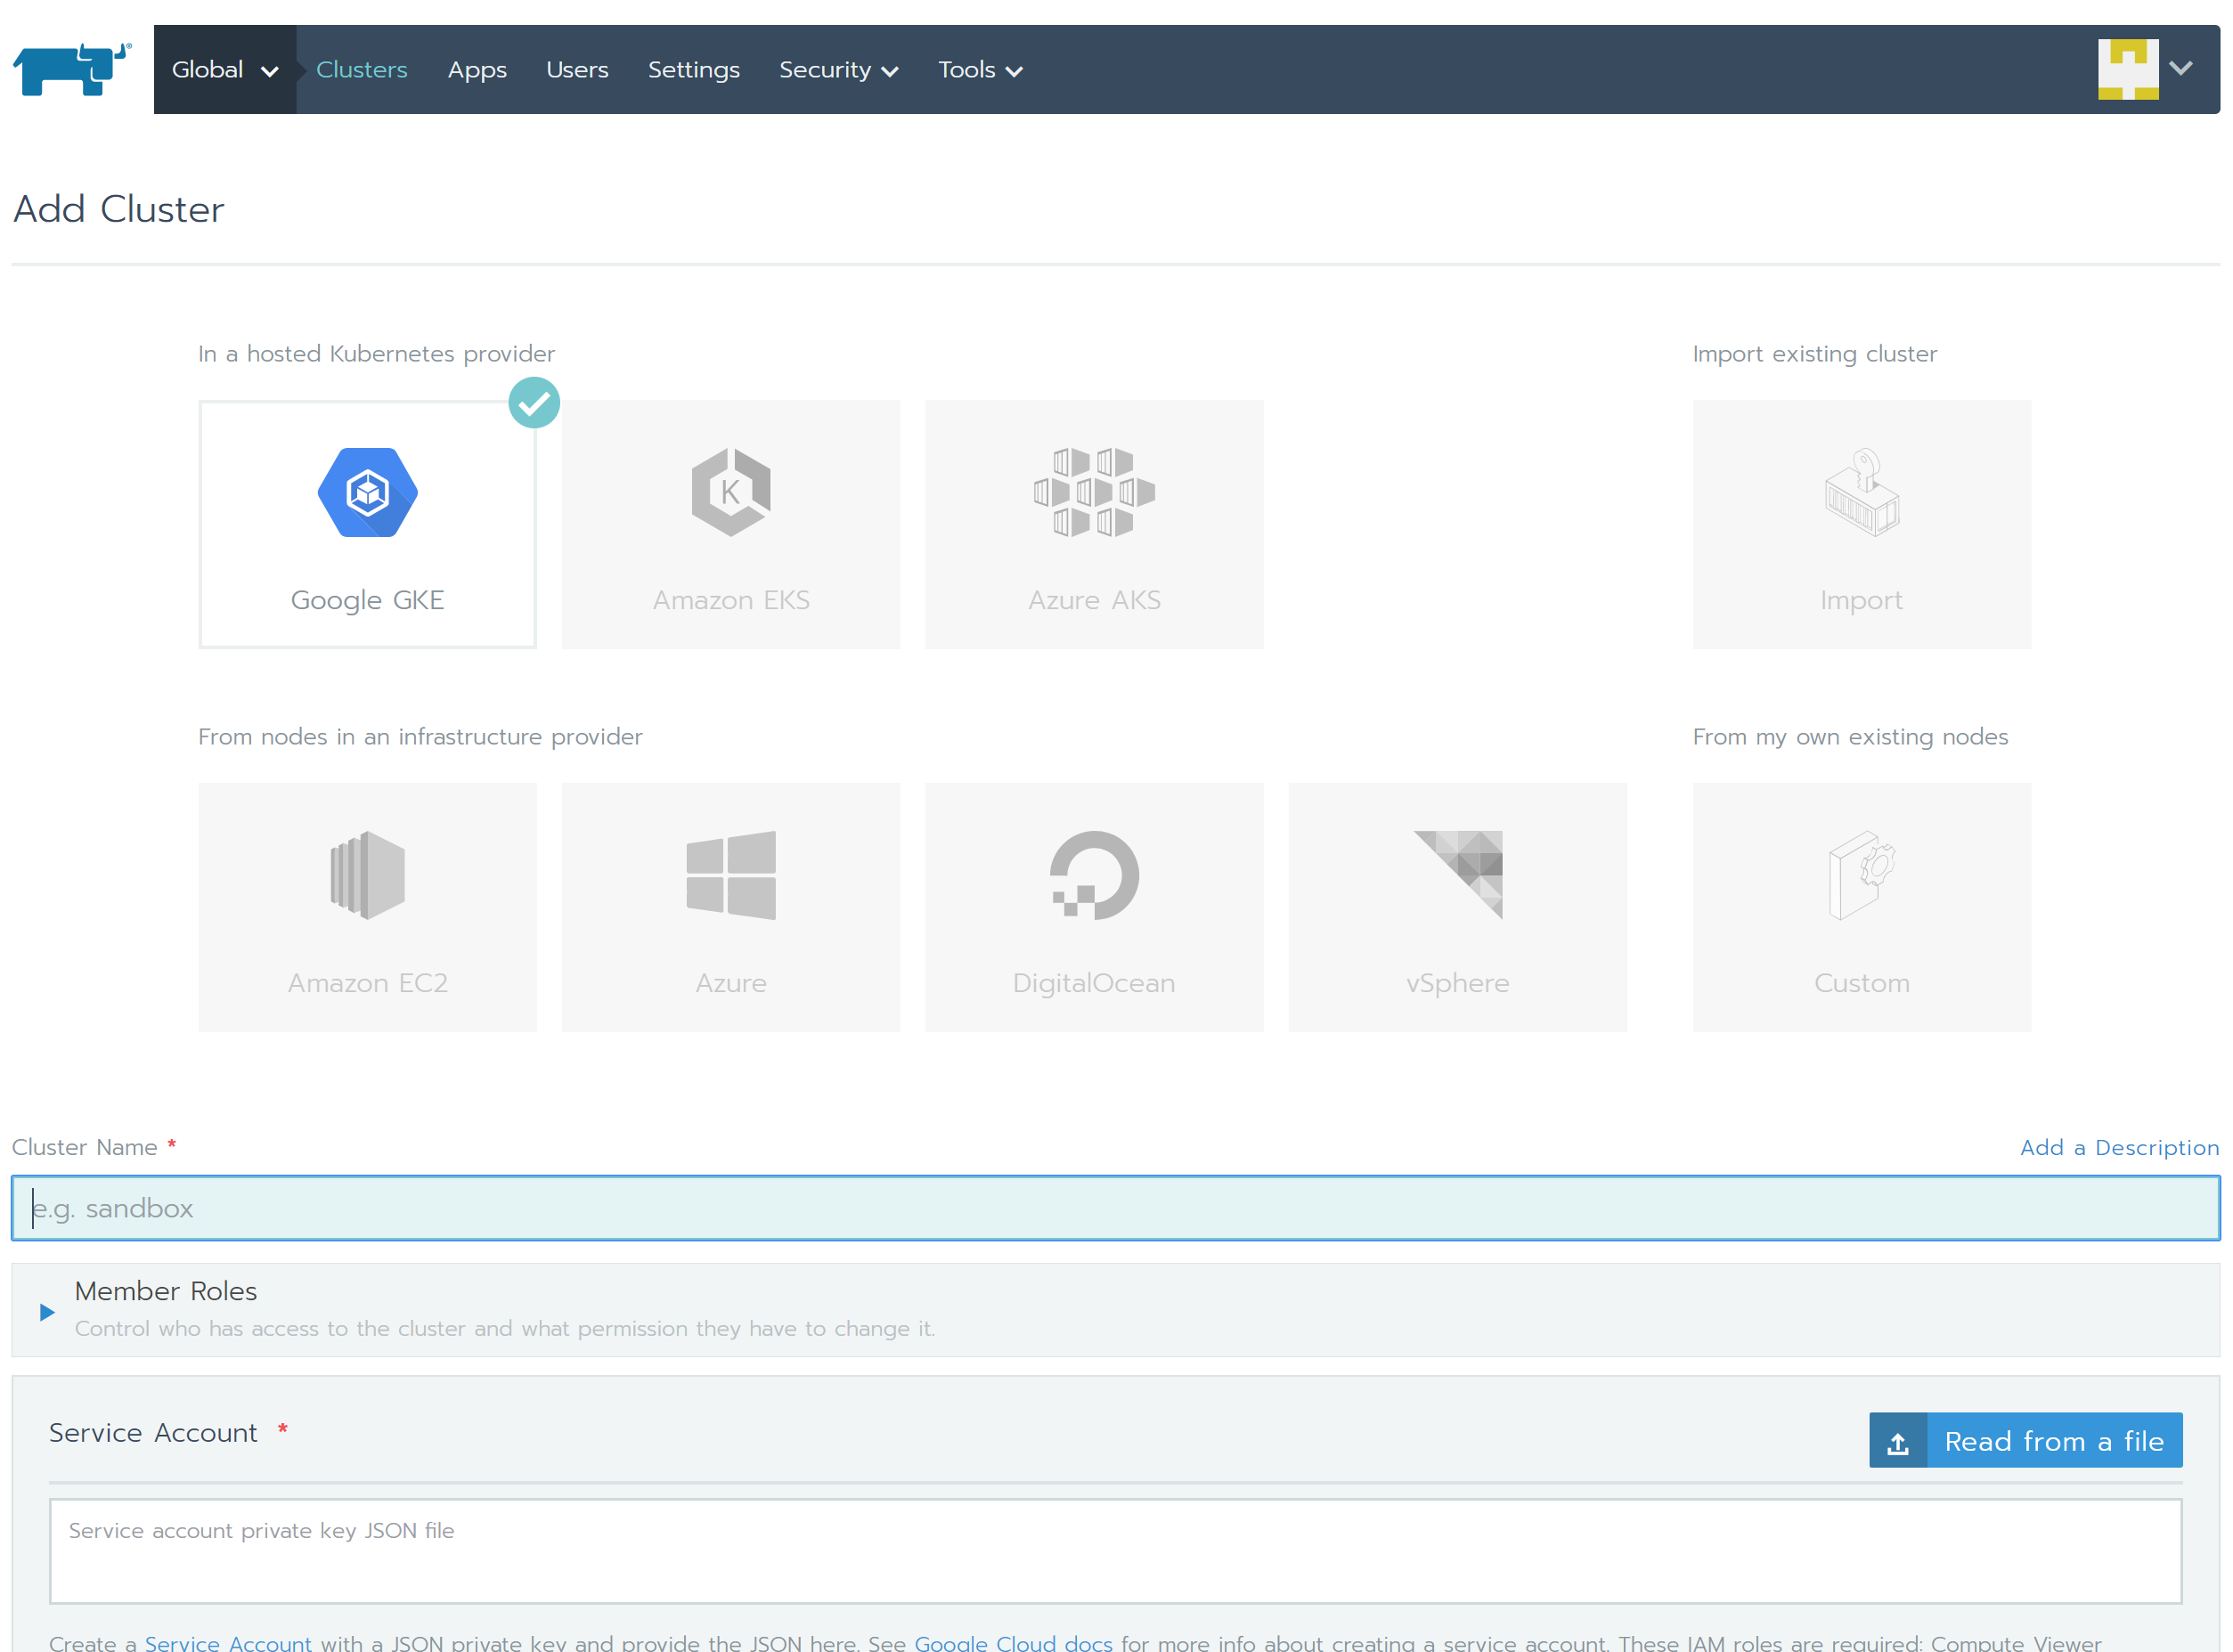
Rancher supports different providers, including Google GKE, Amazon EKS, Azure AKS, Amazon EC2 and DigitalOcean. We will be using Amazon EC2 for this demo.
Understanding How Rancher Deploys Cluster using EC2
Node Template
Node template is the configuration of nodes that are used to provision the cluster. These templates use Docker Machine configuration options to define an operating system image and settings/parameters for the node. For example the availability zone, VPC and subnet that the node would be deployed to, its security group, instance type, disk size and IAM profile.
Node Pool
Node pool is a collection of nodes based on a node template. There are three node roles in Rancher, Etcd, Control Plane and Worker.
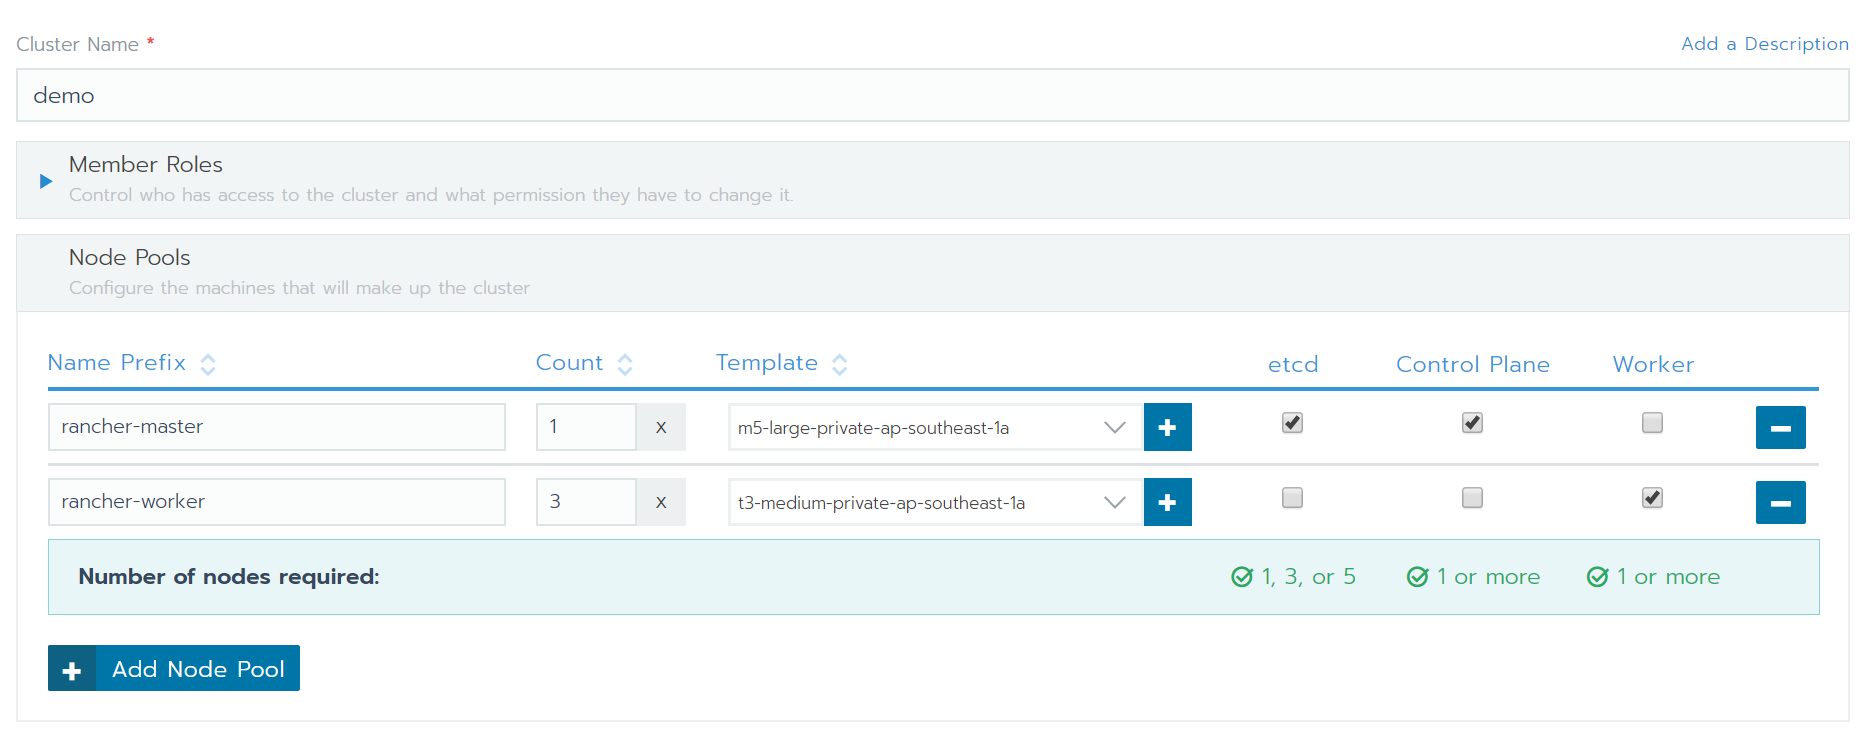
For Etcd node role, in order to maintain the Etcd quorum, the number of nodes required is either 1, 3, or 5. As for Control Plane and Worker node roles, only 1 or more nodes is required.
Each node pool could have one or more nodes roles assigned, meaning that we can actually create a single node Kubernetes Cluster for sandbox purpose. (Obviously, it is not recommended in production)
AWS Cloud Provider
Cloud provider provides the interface between Kubernetes and AWS service APIs.
Since we would want our Kubernetes cluster to register Amazon as the Cloud Provider (So that we can use ELB, attach EBS etc), we need to specify an IAM Instance Profile. In case you don’t have one, here’s an example policy:
Deploy a Kubernetes Cluster
1. Create Node Templates
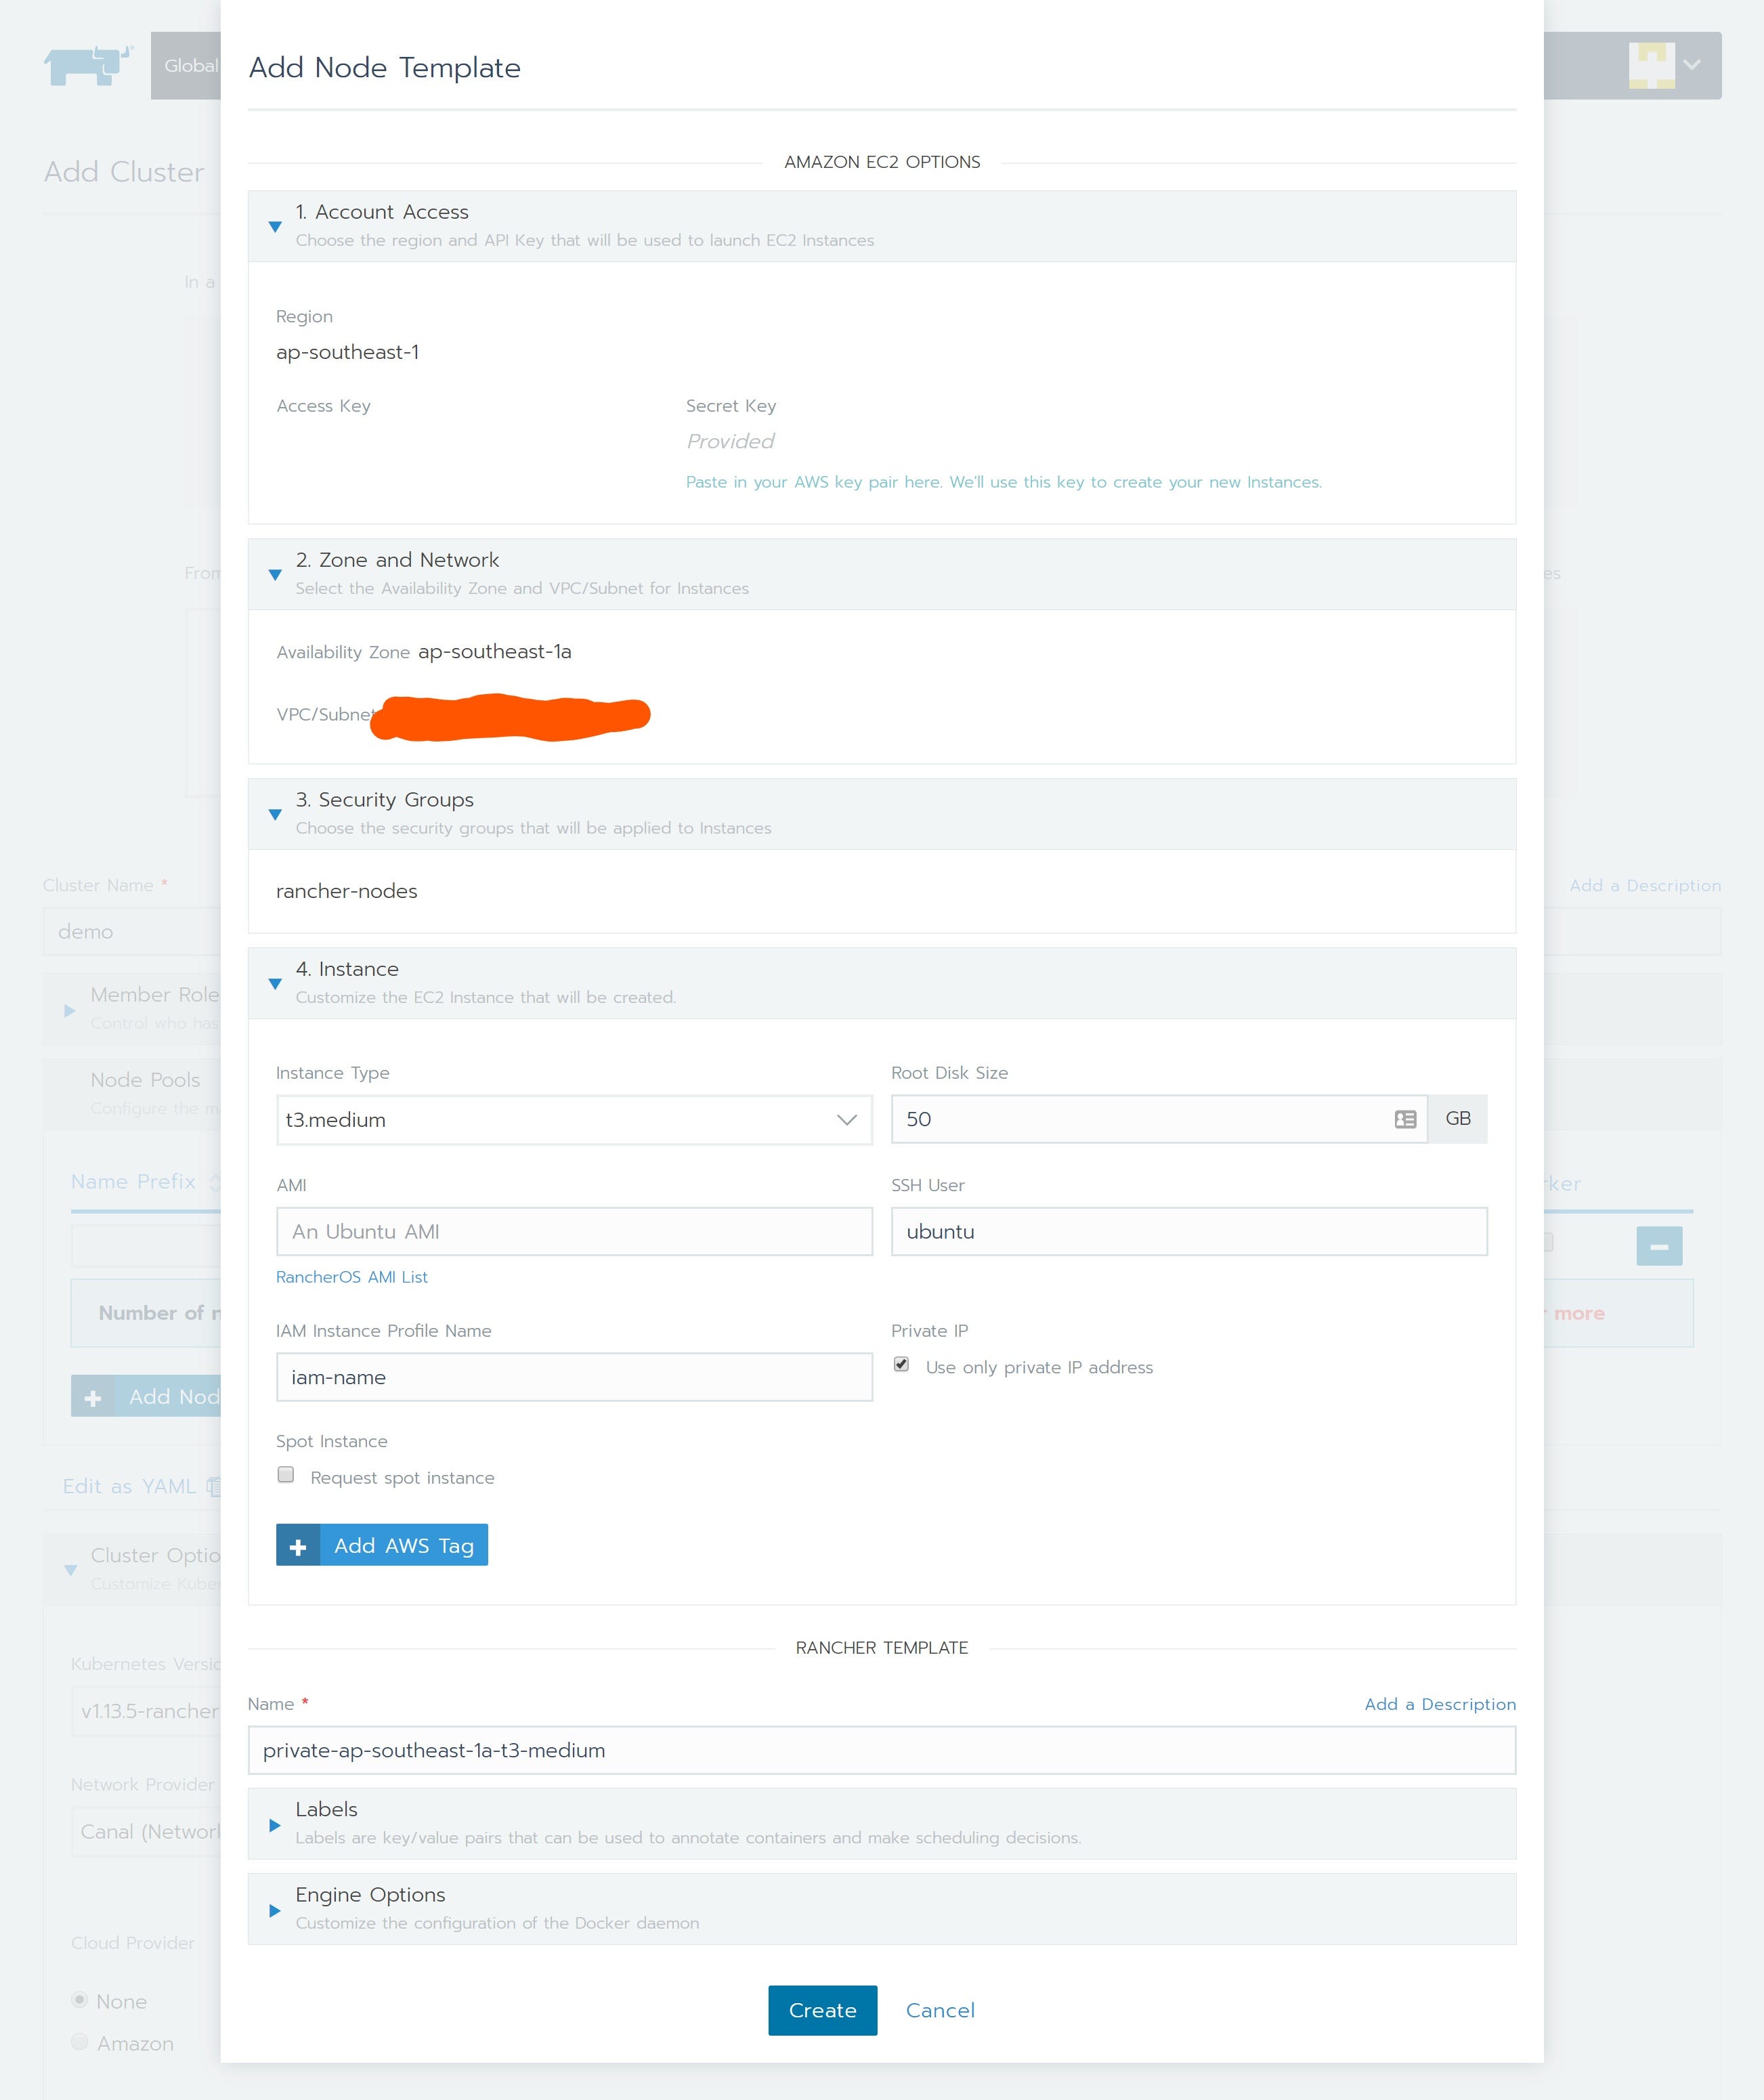
Name our cluster and setup node pools. Create a node template to define the type of instances and its networking configuration. Once you provide the AWS credential, Rancher will automatically grab the regions VPC and subnets.
One thing to note is that there is no auto VPC creation, we will need to manually create and maintain the VPC in Amazon console.
Next, in security group, we can let Rancher create one for us. Checkout Rancher Documentation for the ports requirement if you prefer to create your own security group.
Then, in instance setting, adjust the instance type and instance storage. If yourare deploying the node to a private subnet, remember to enable the “Use only private IP address” option.
We don’t recommend using spot instance as Rancher would not automatically drain and redeploy the node right out of the box. There seems to have a helm package to take care of this, but we haven't tried it.

2. Specify node pools and their roles
In this demo, we would create the following two node pools:
- Rancher-master: For Etcd and Control Plane role (using a single m5-large instance)
- Rancher-worker: For Worker role (using 3 t3-medium instances)

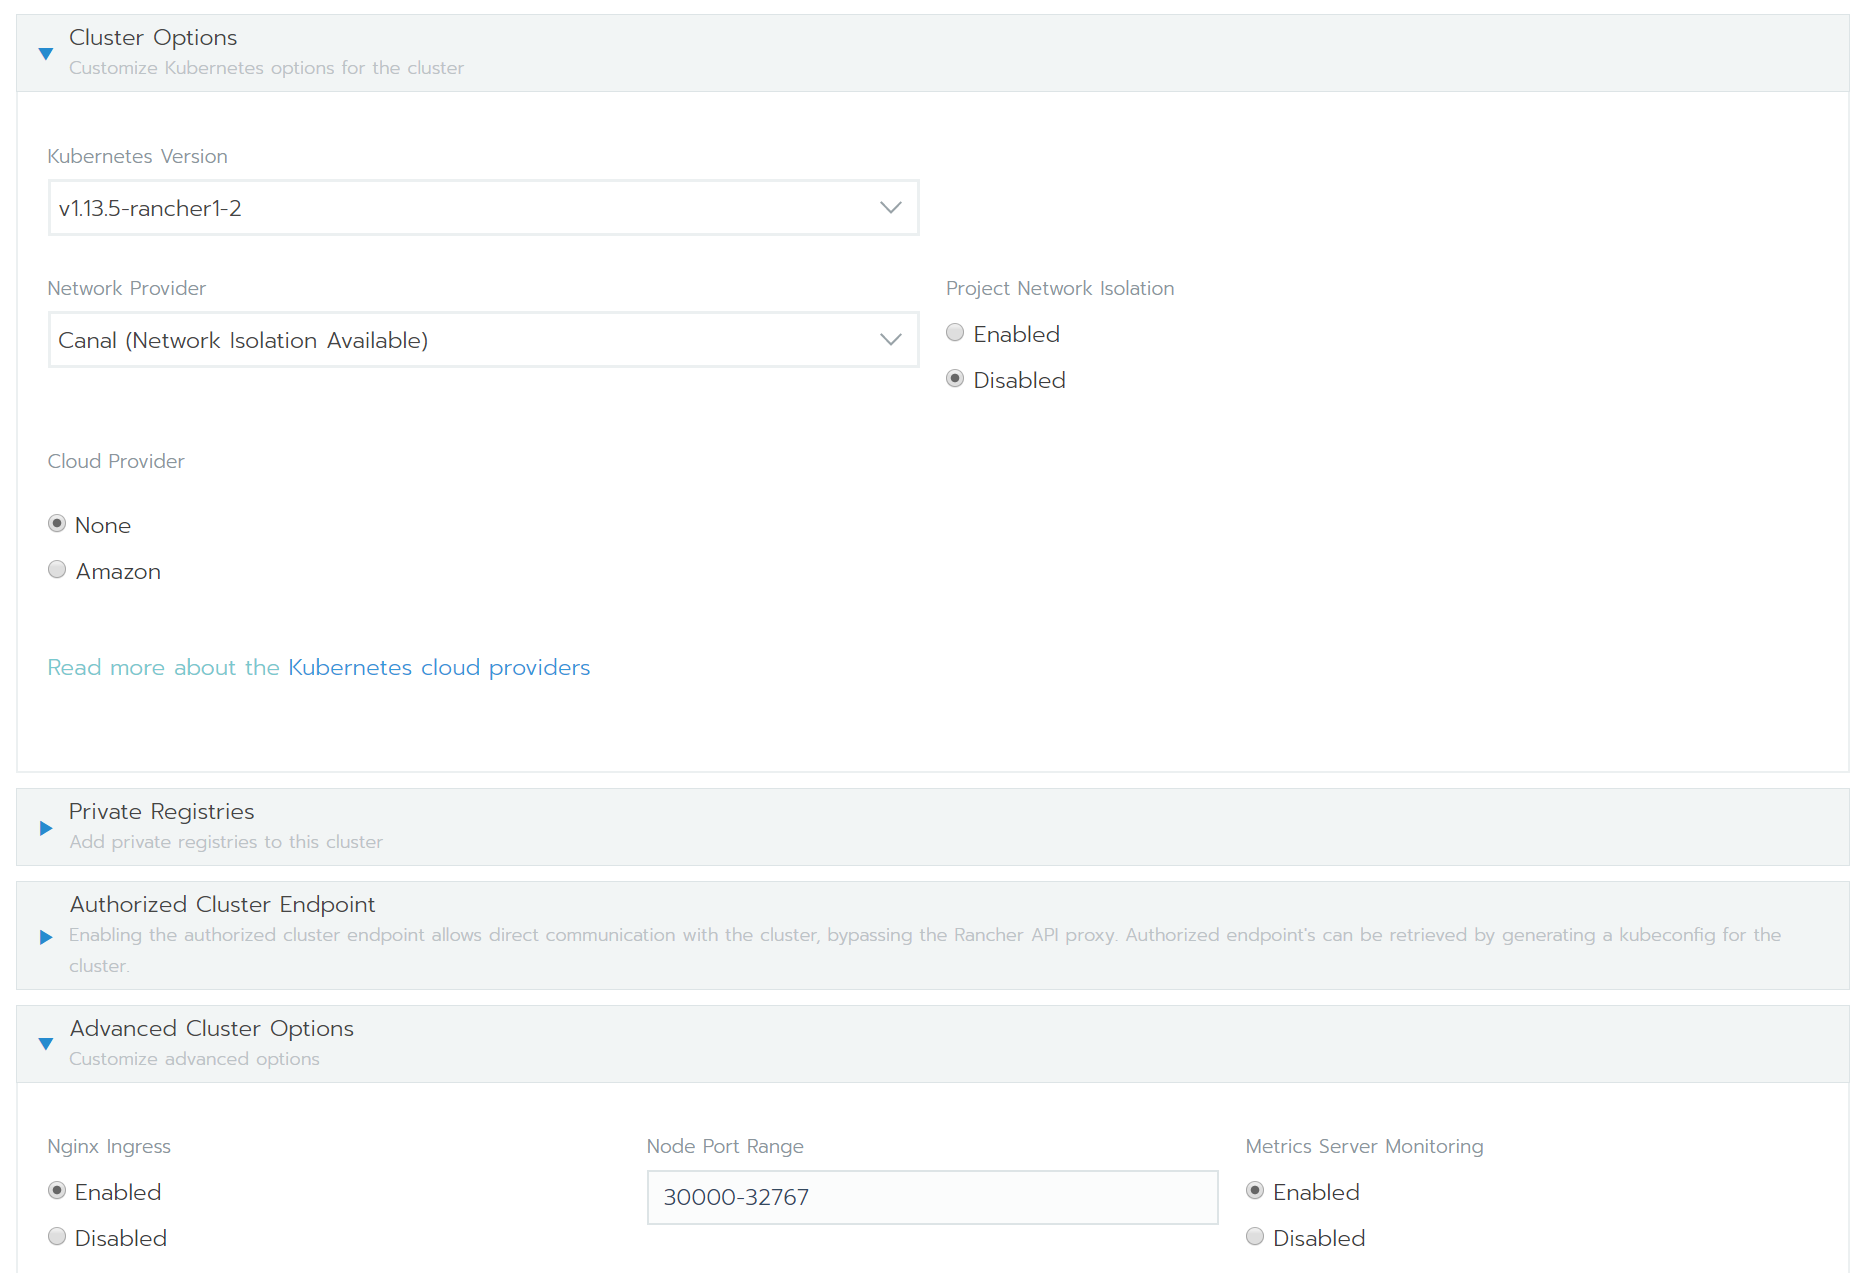
3. Edit cluster options
Make sure we are running the latest stable version of Kubernetes (at the time of writing, it’s v.1.13–5rancher1–2). Use Canal as the network provider and select Amazon as Cloud Provider.
Click the “Show advanced options” link located to the right, and check advanced cluster options. By default, Rancher help us to deploy an Nginx Ingress that uses a NodePort service. Disable it if you plan to deploy ELBs.

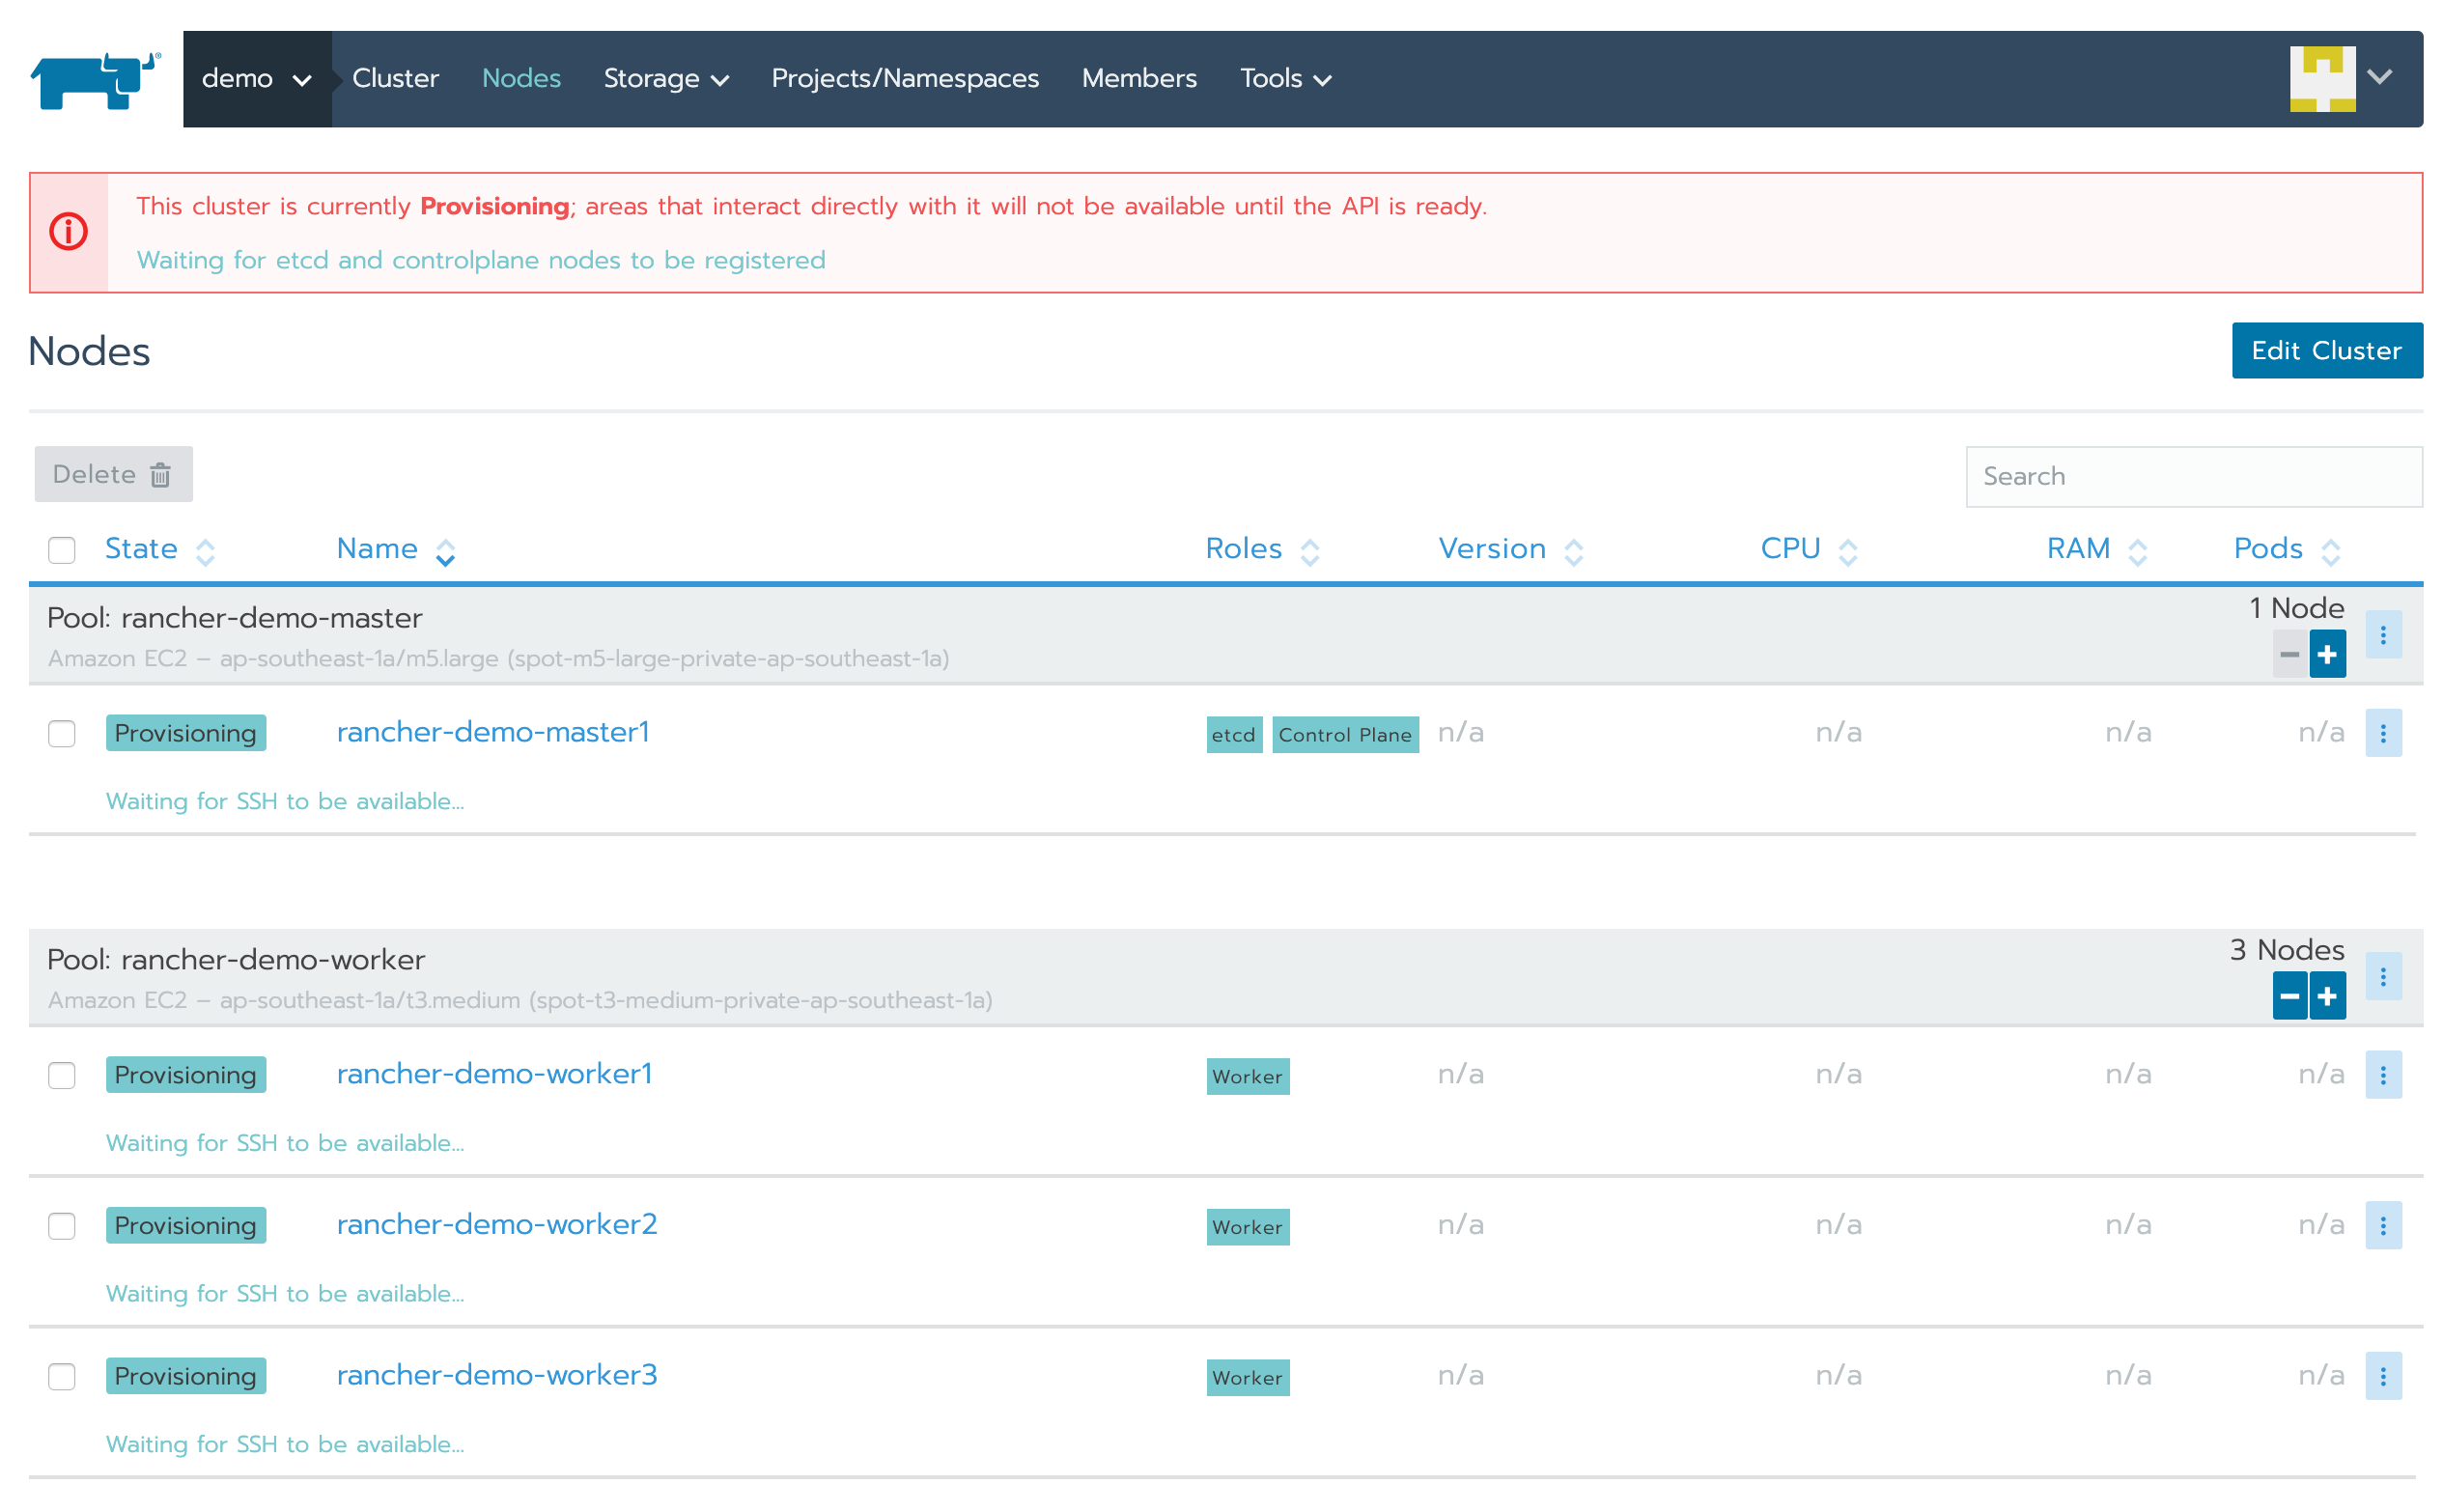
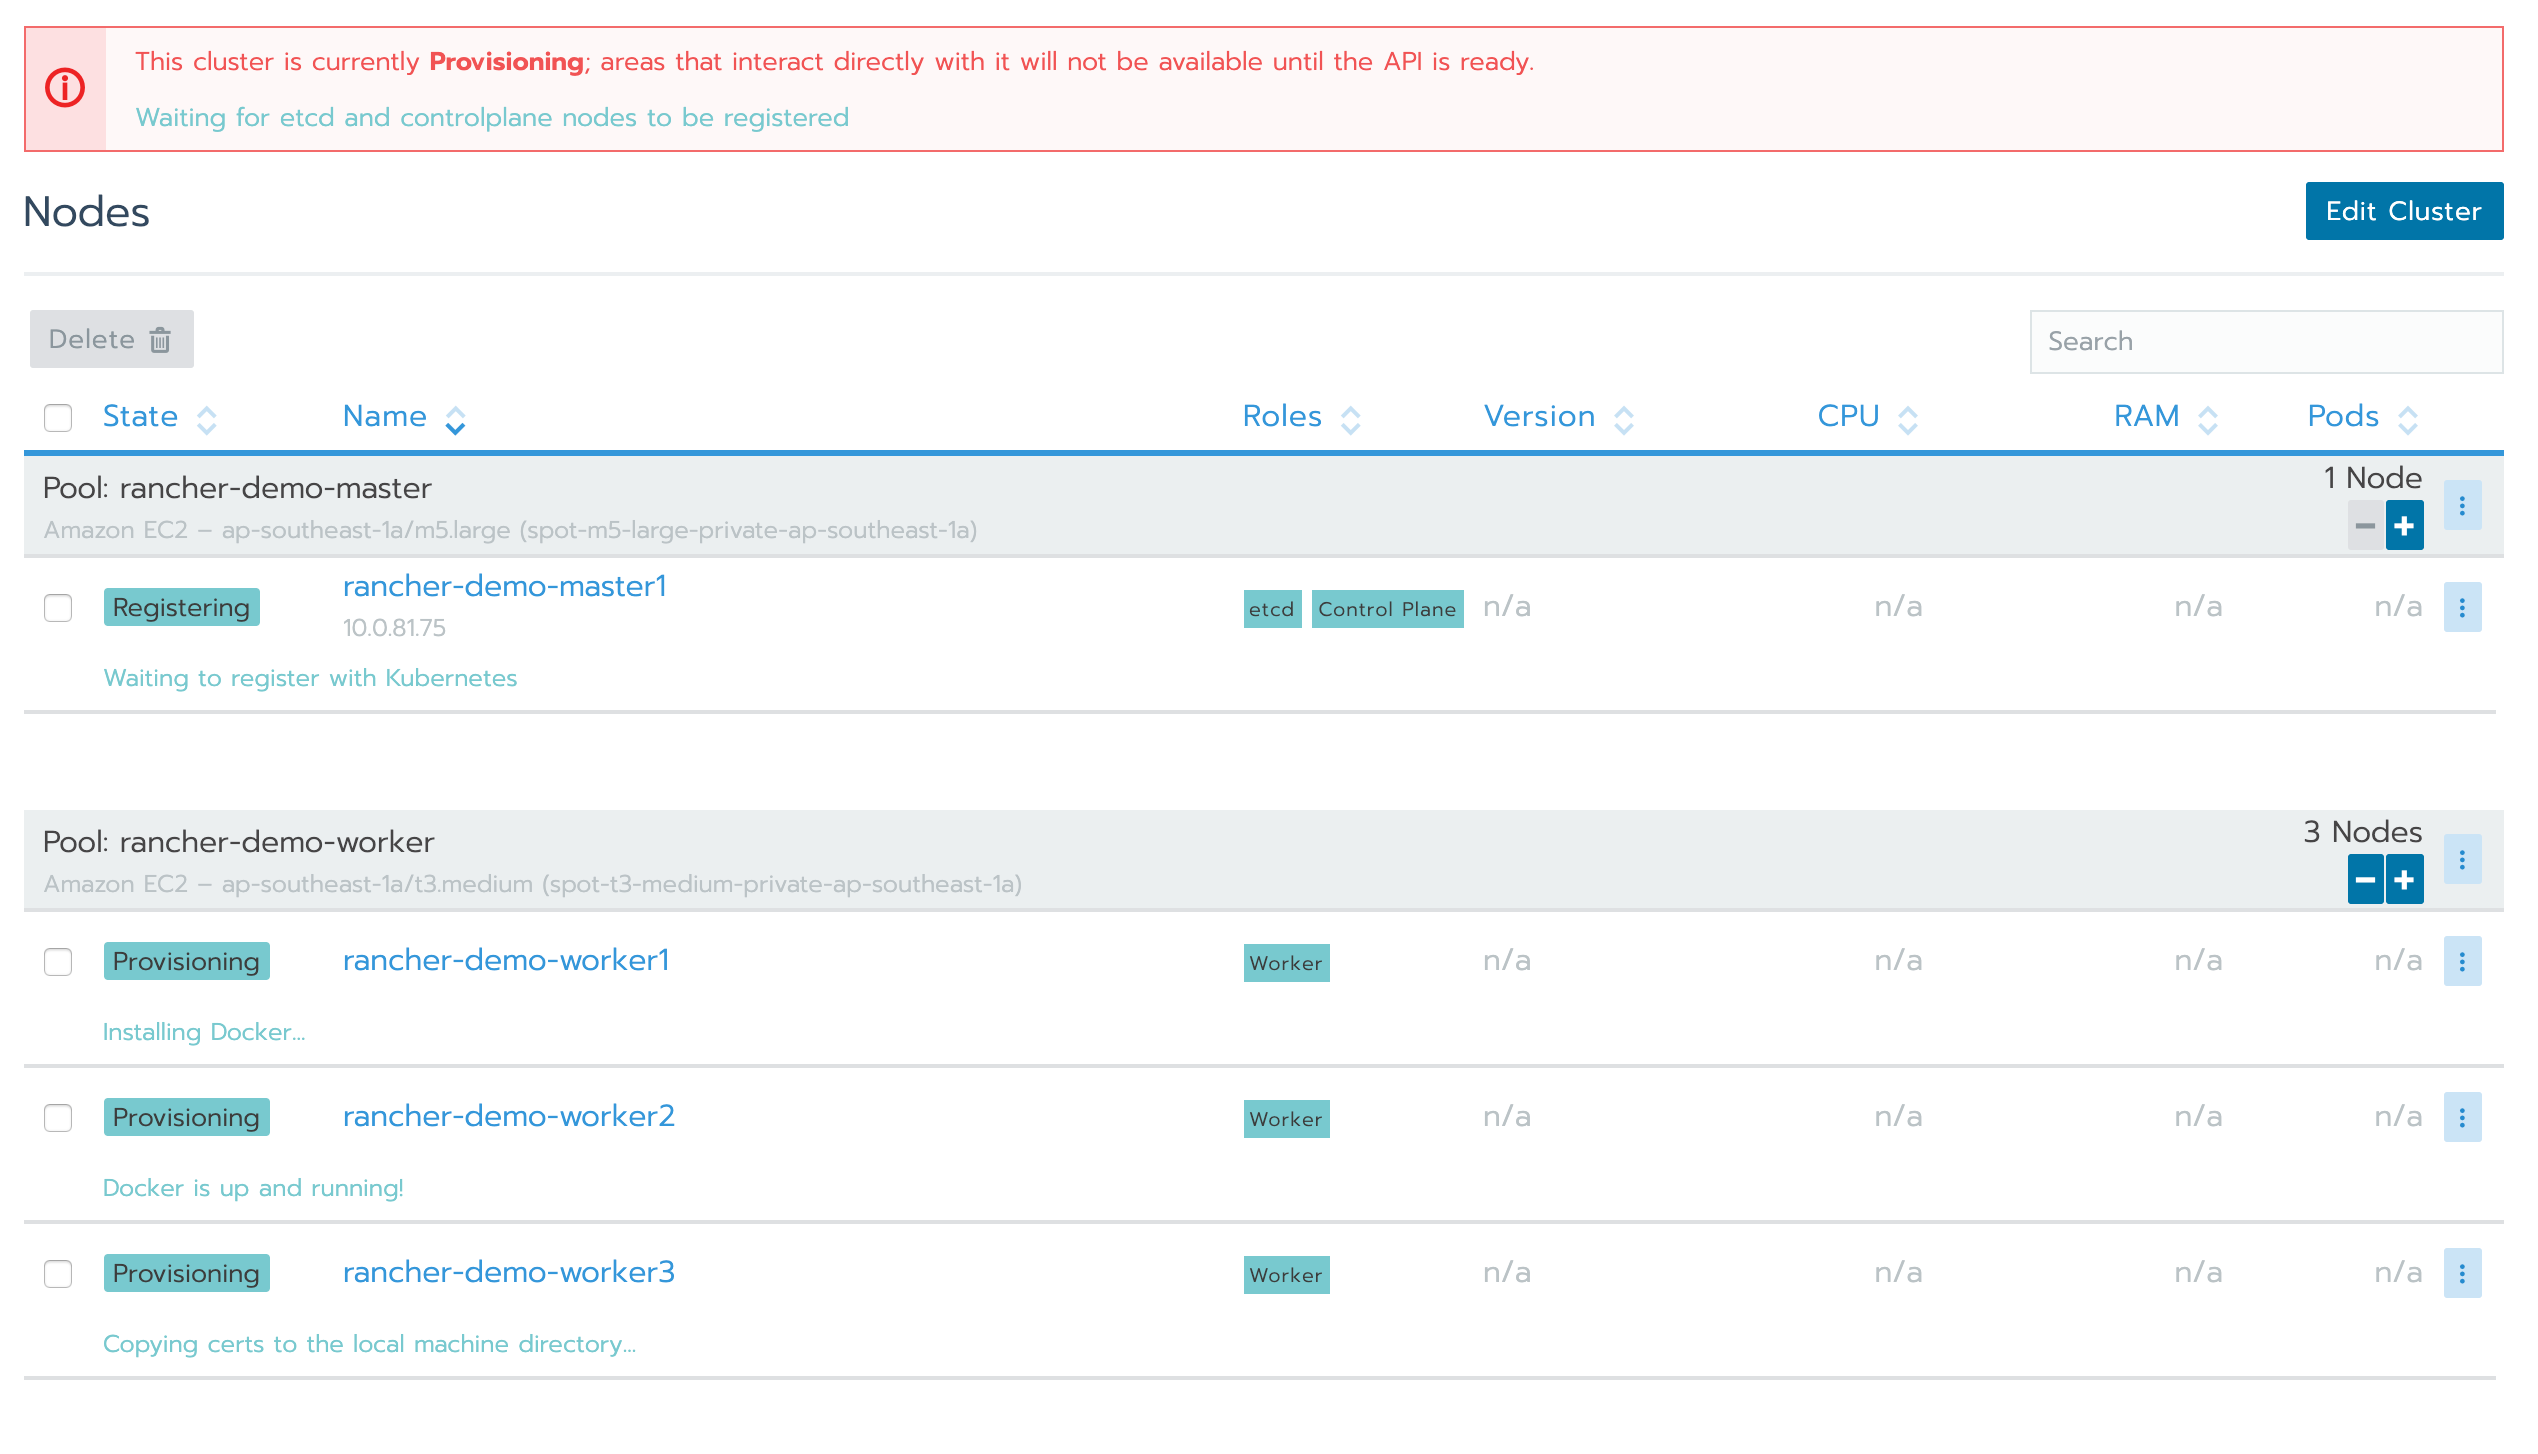
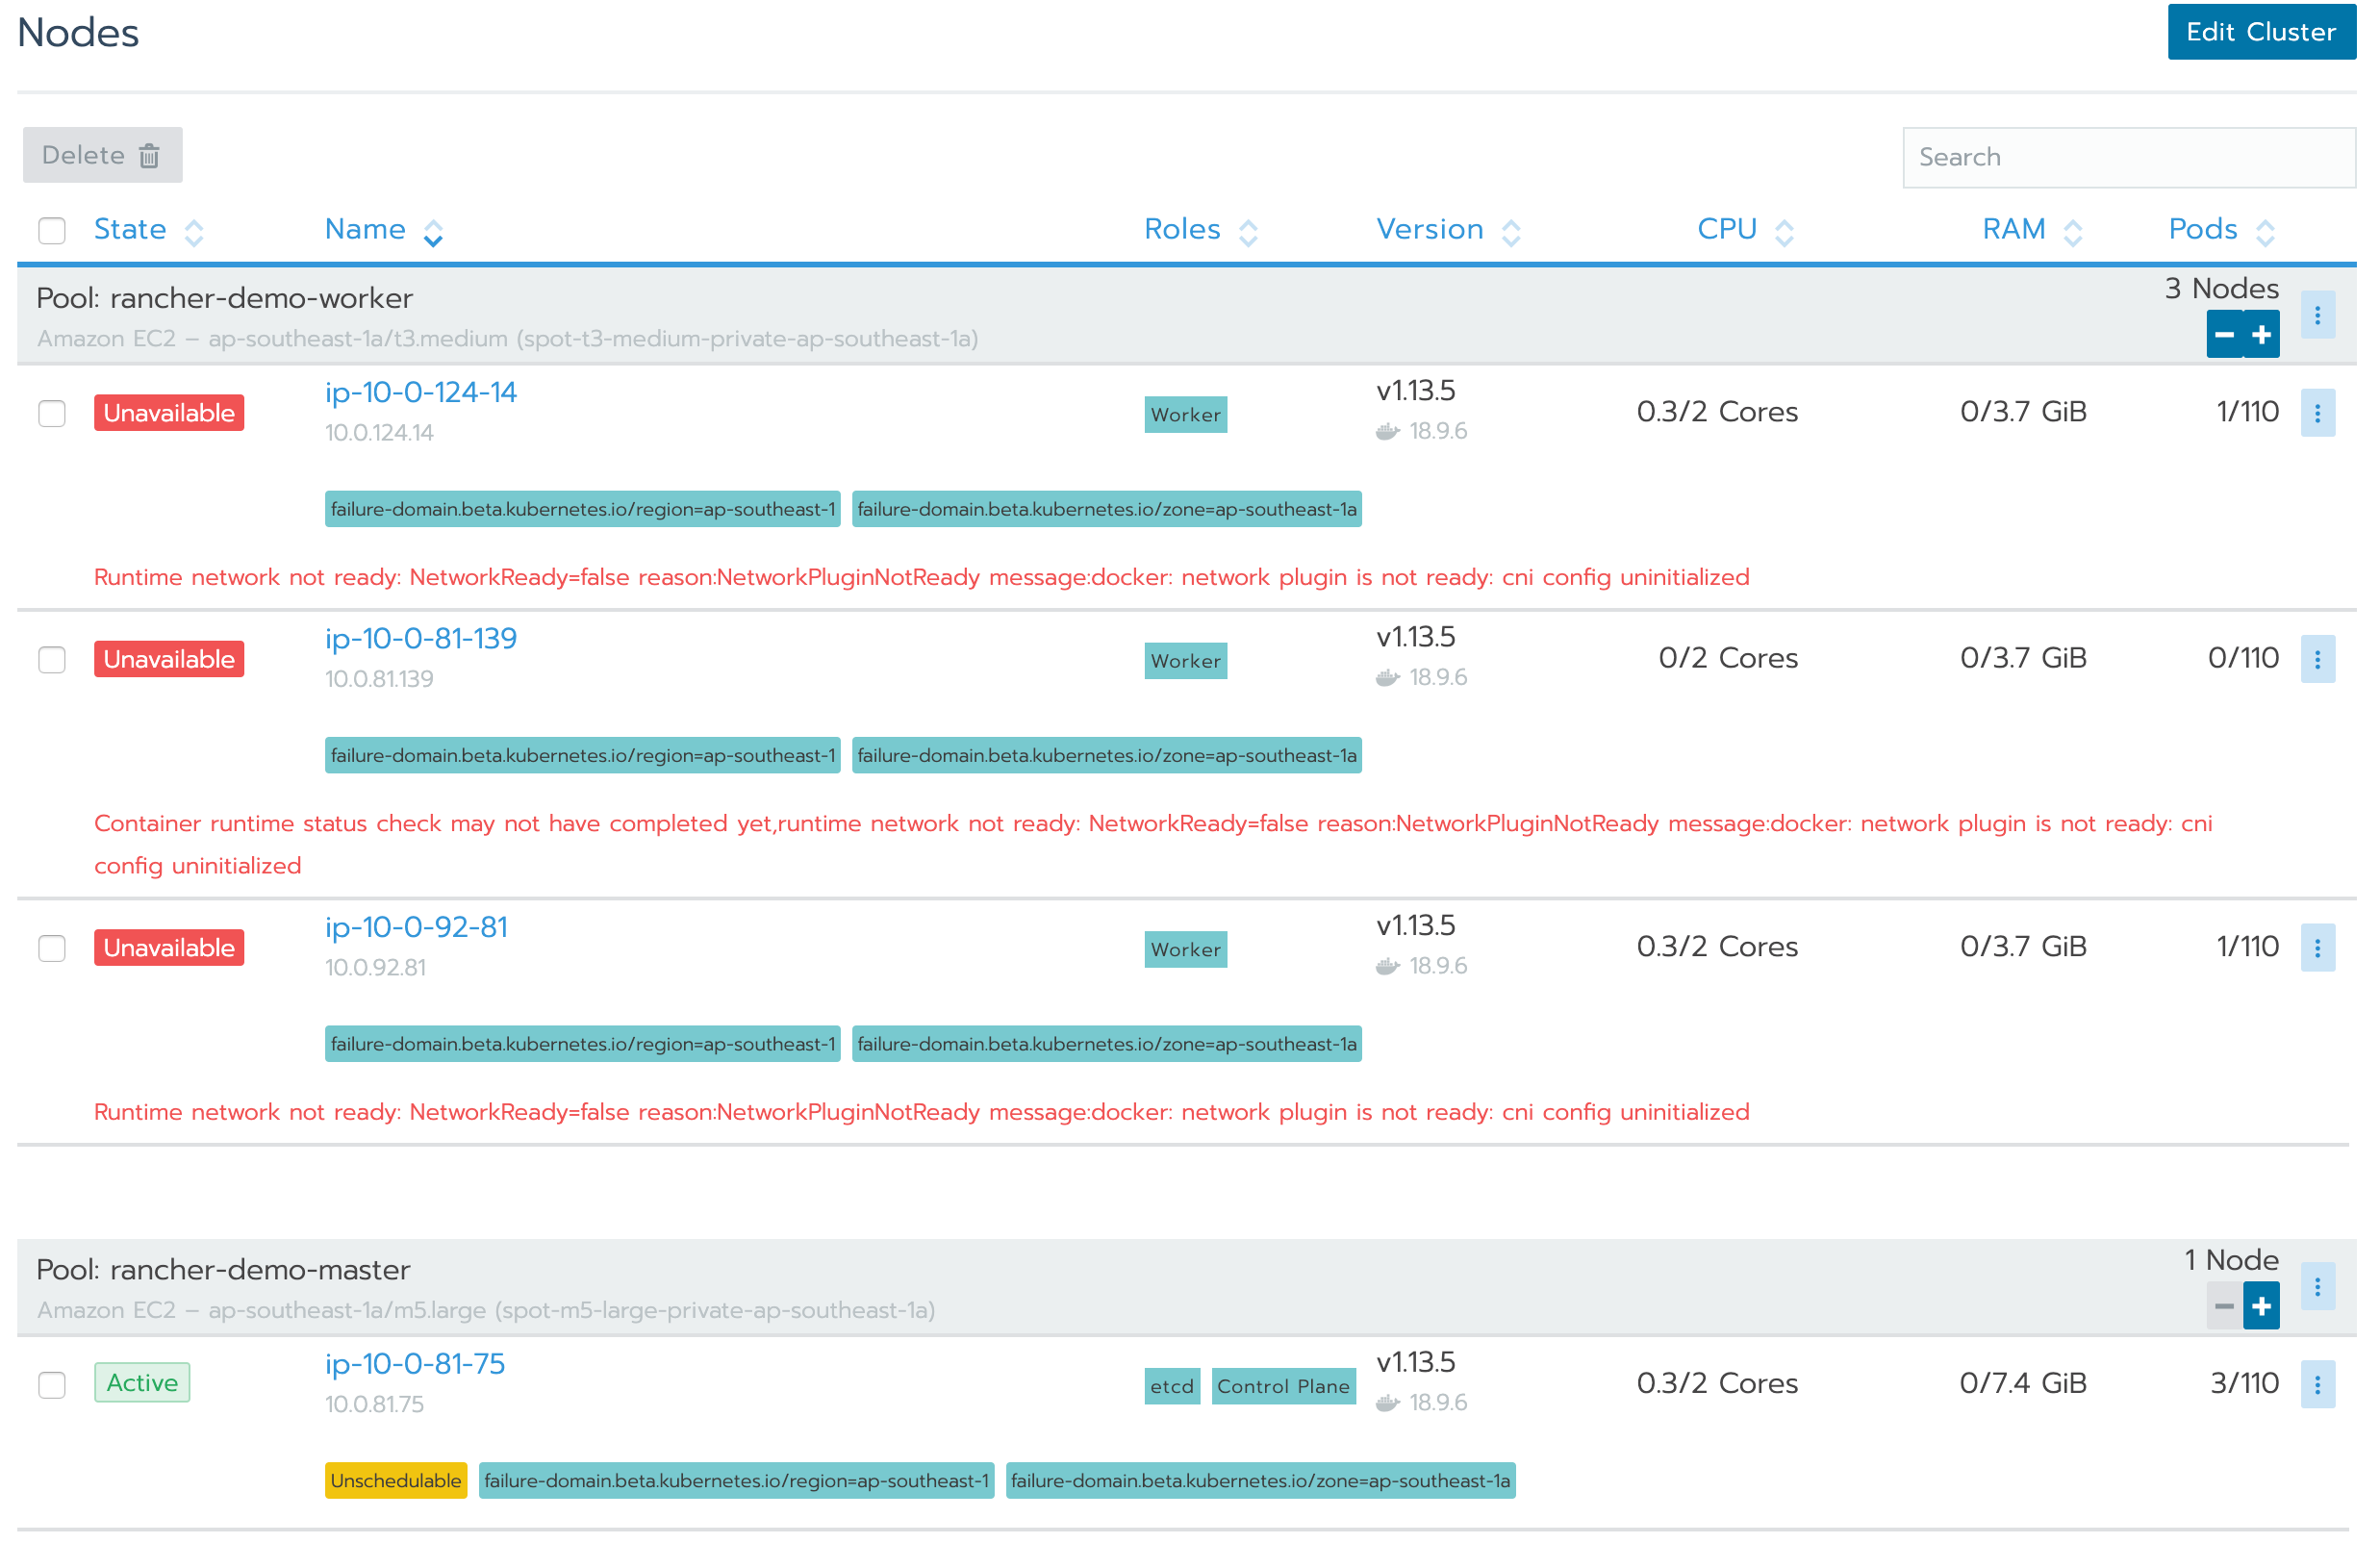
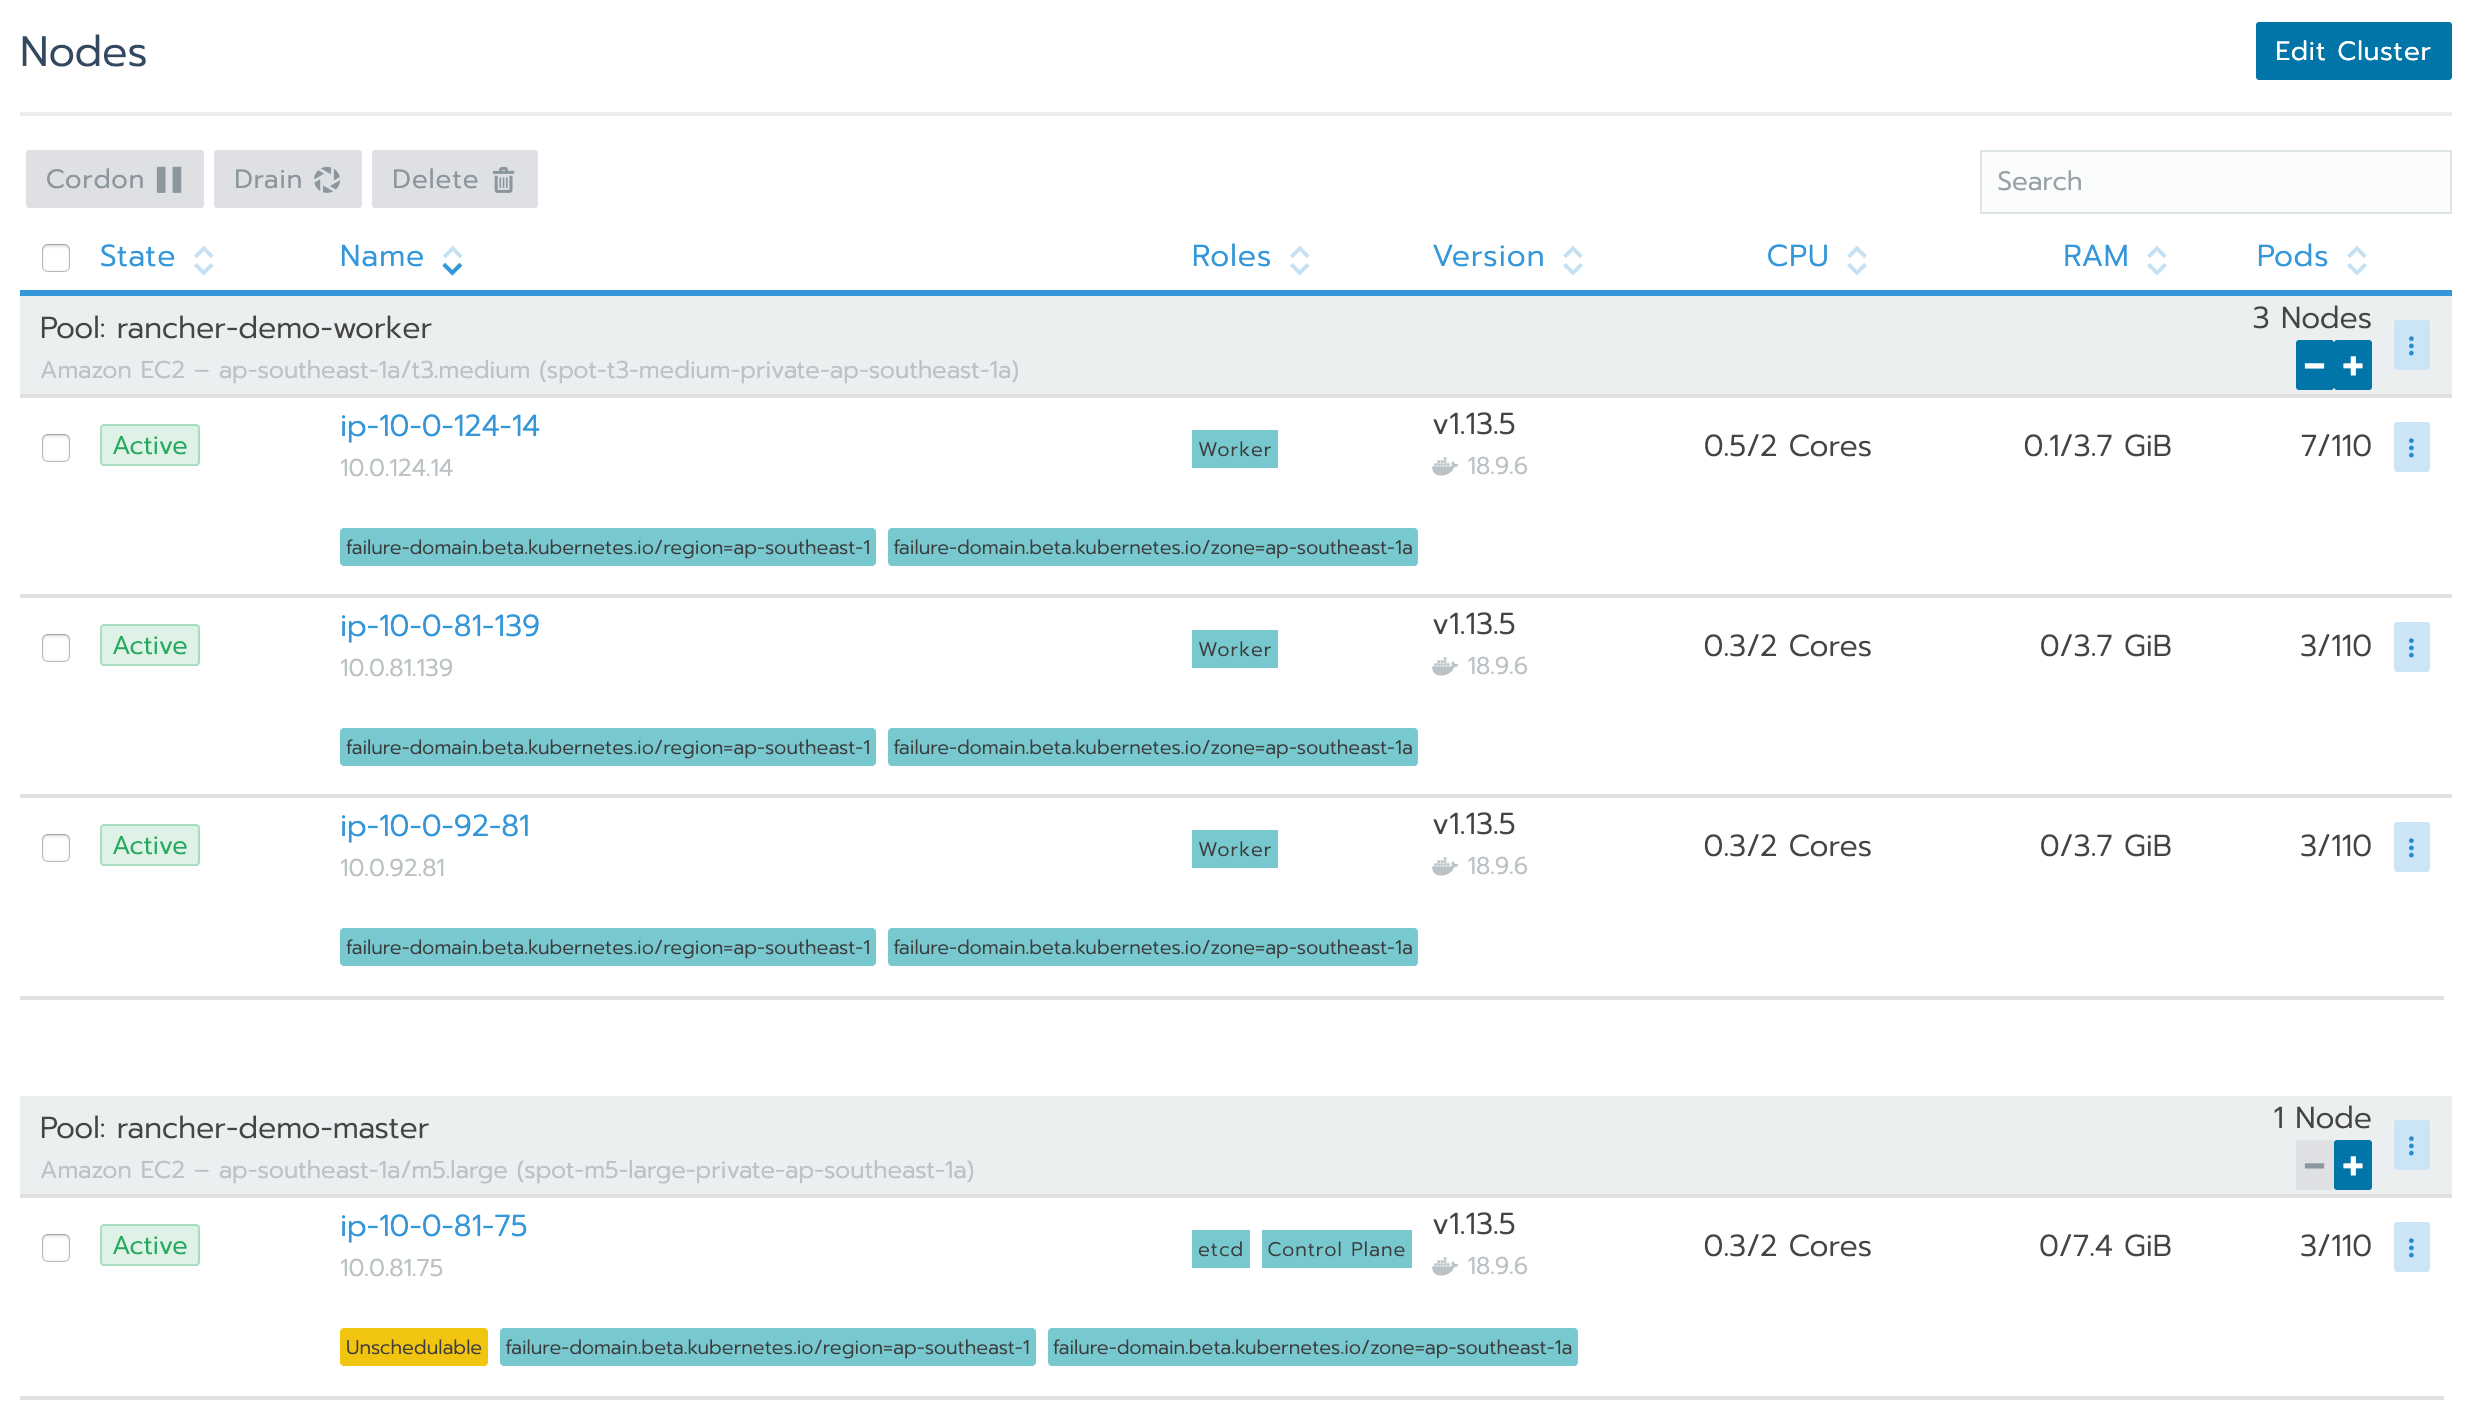
4. Create and wait
Check that everything is correct and click create. Rancher would start provisioning instances and bootstrap our cluster in less than 10 minutes.


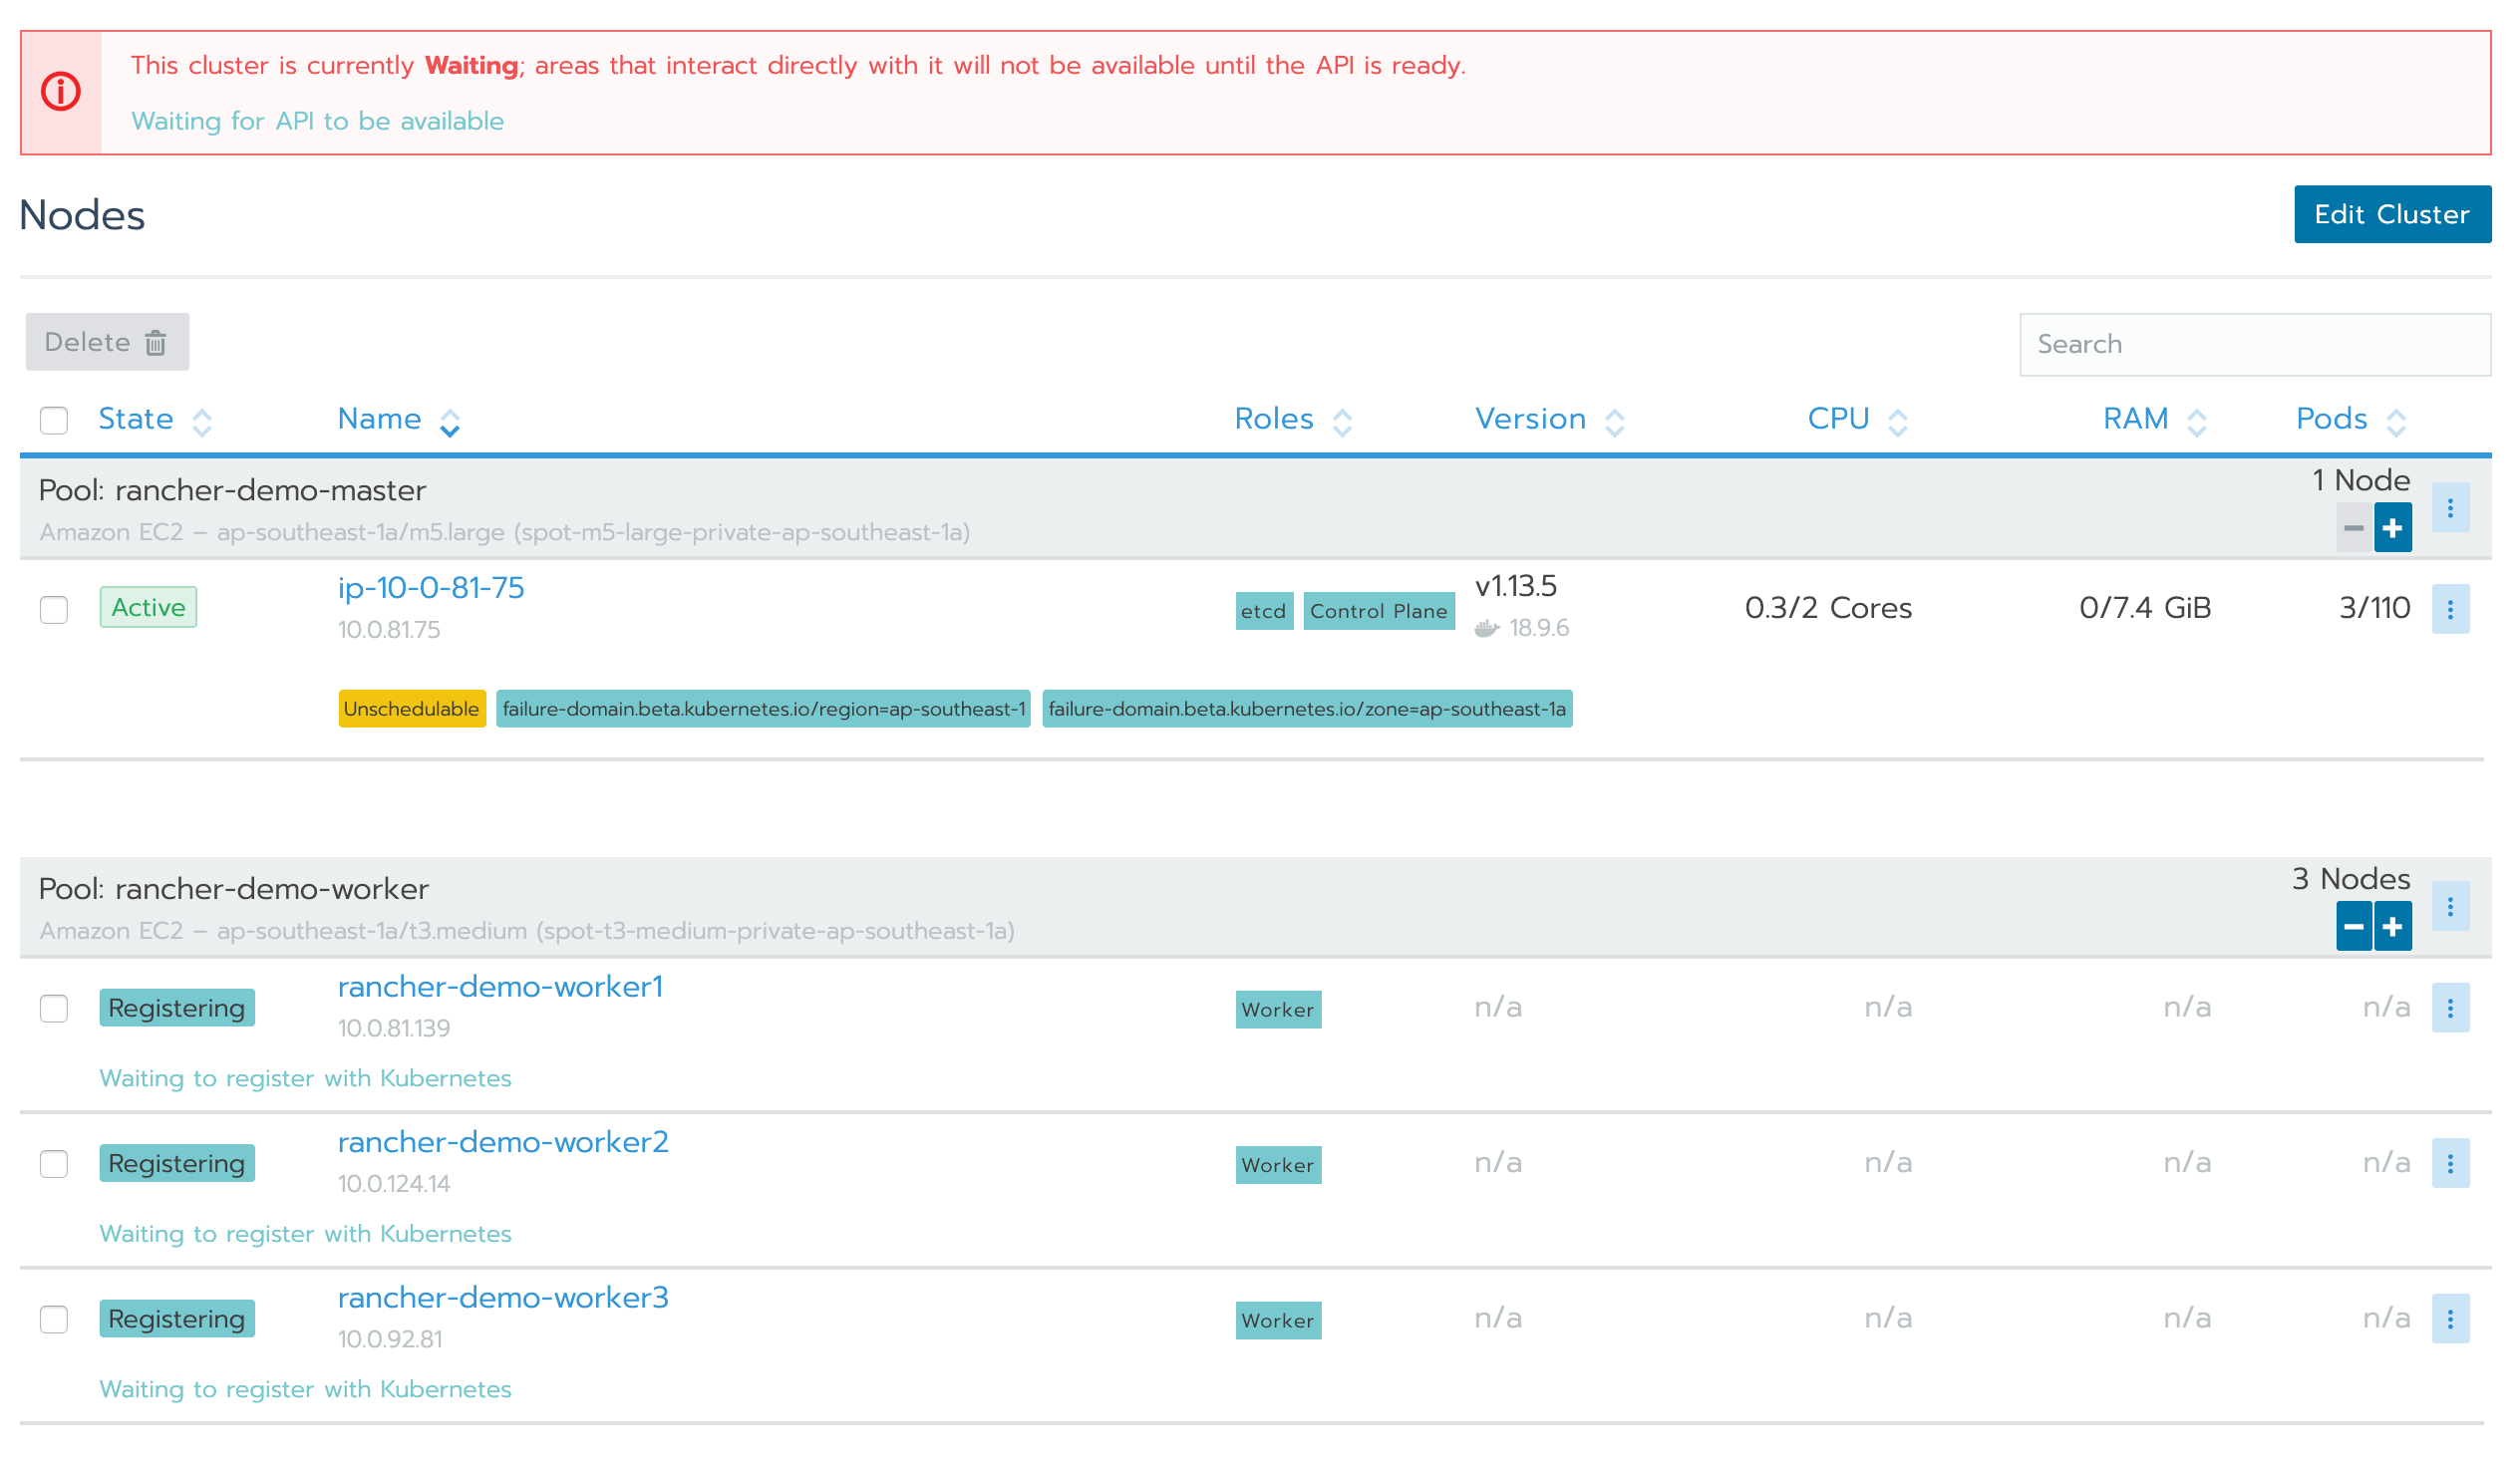


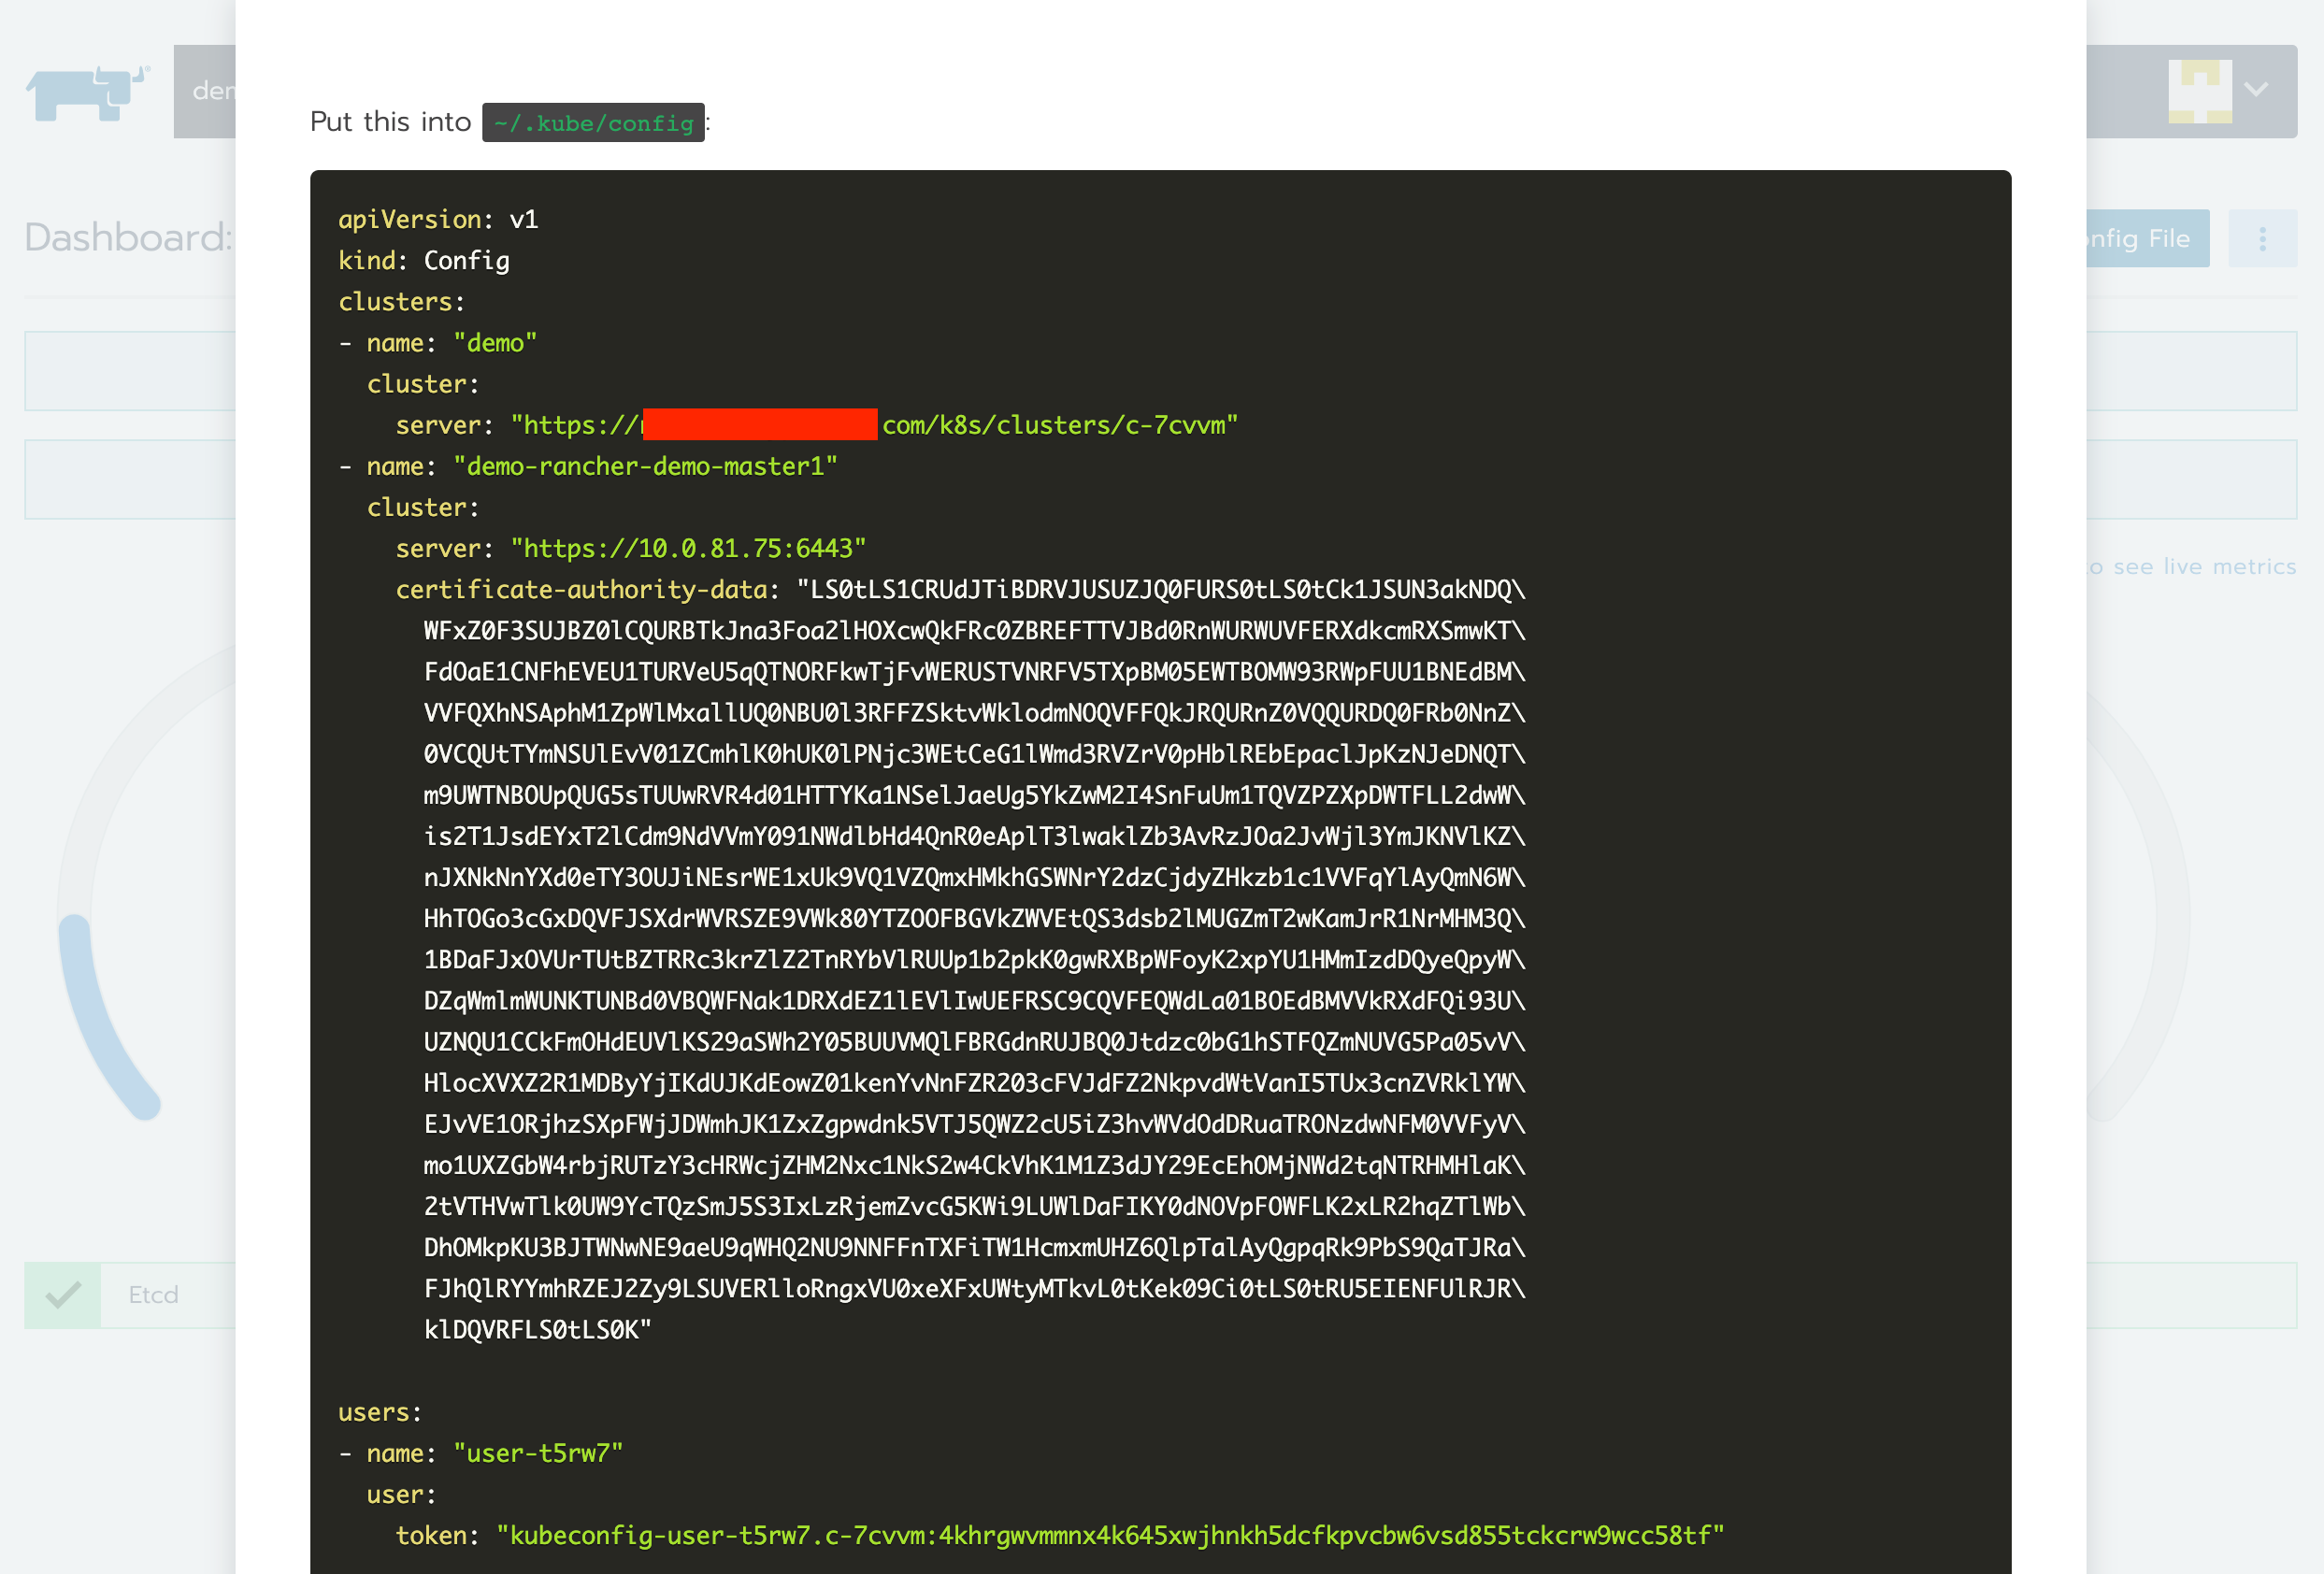
Connect to Our Cluster using Kubectl
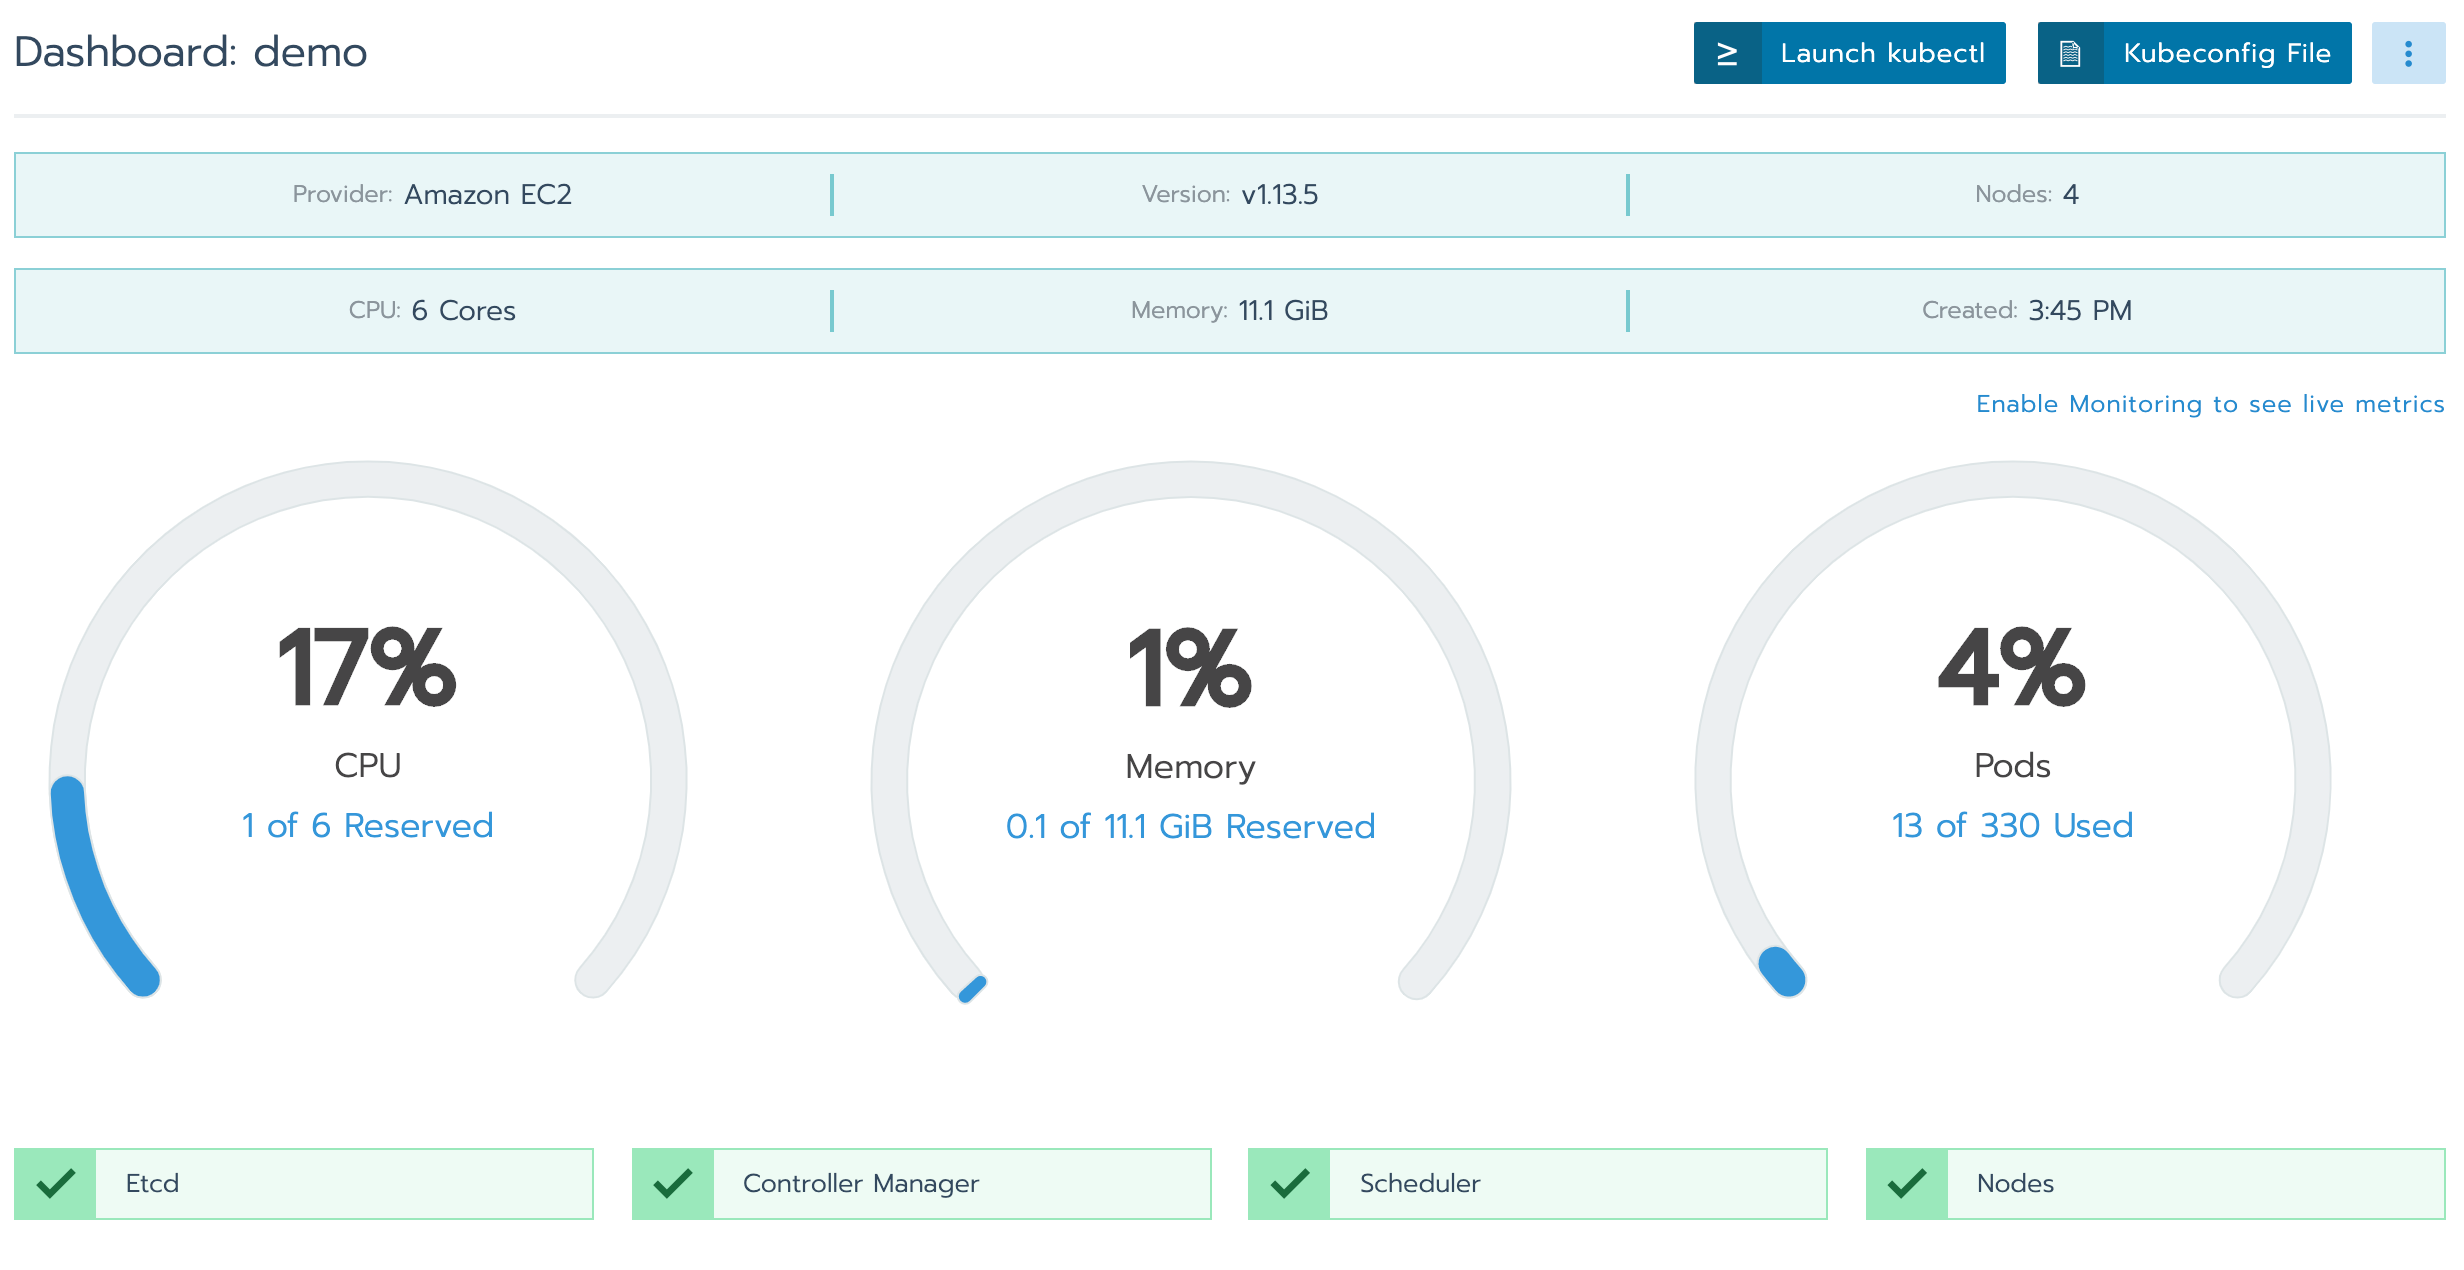
Now that our Kubernetes Cluster is ready, we can connect to it using Kubectl. Click the kubeconfig file button to download the kubeconfig for our cluster.

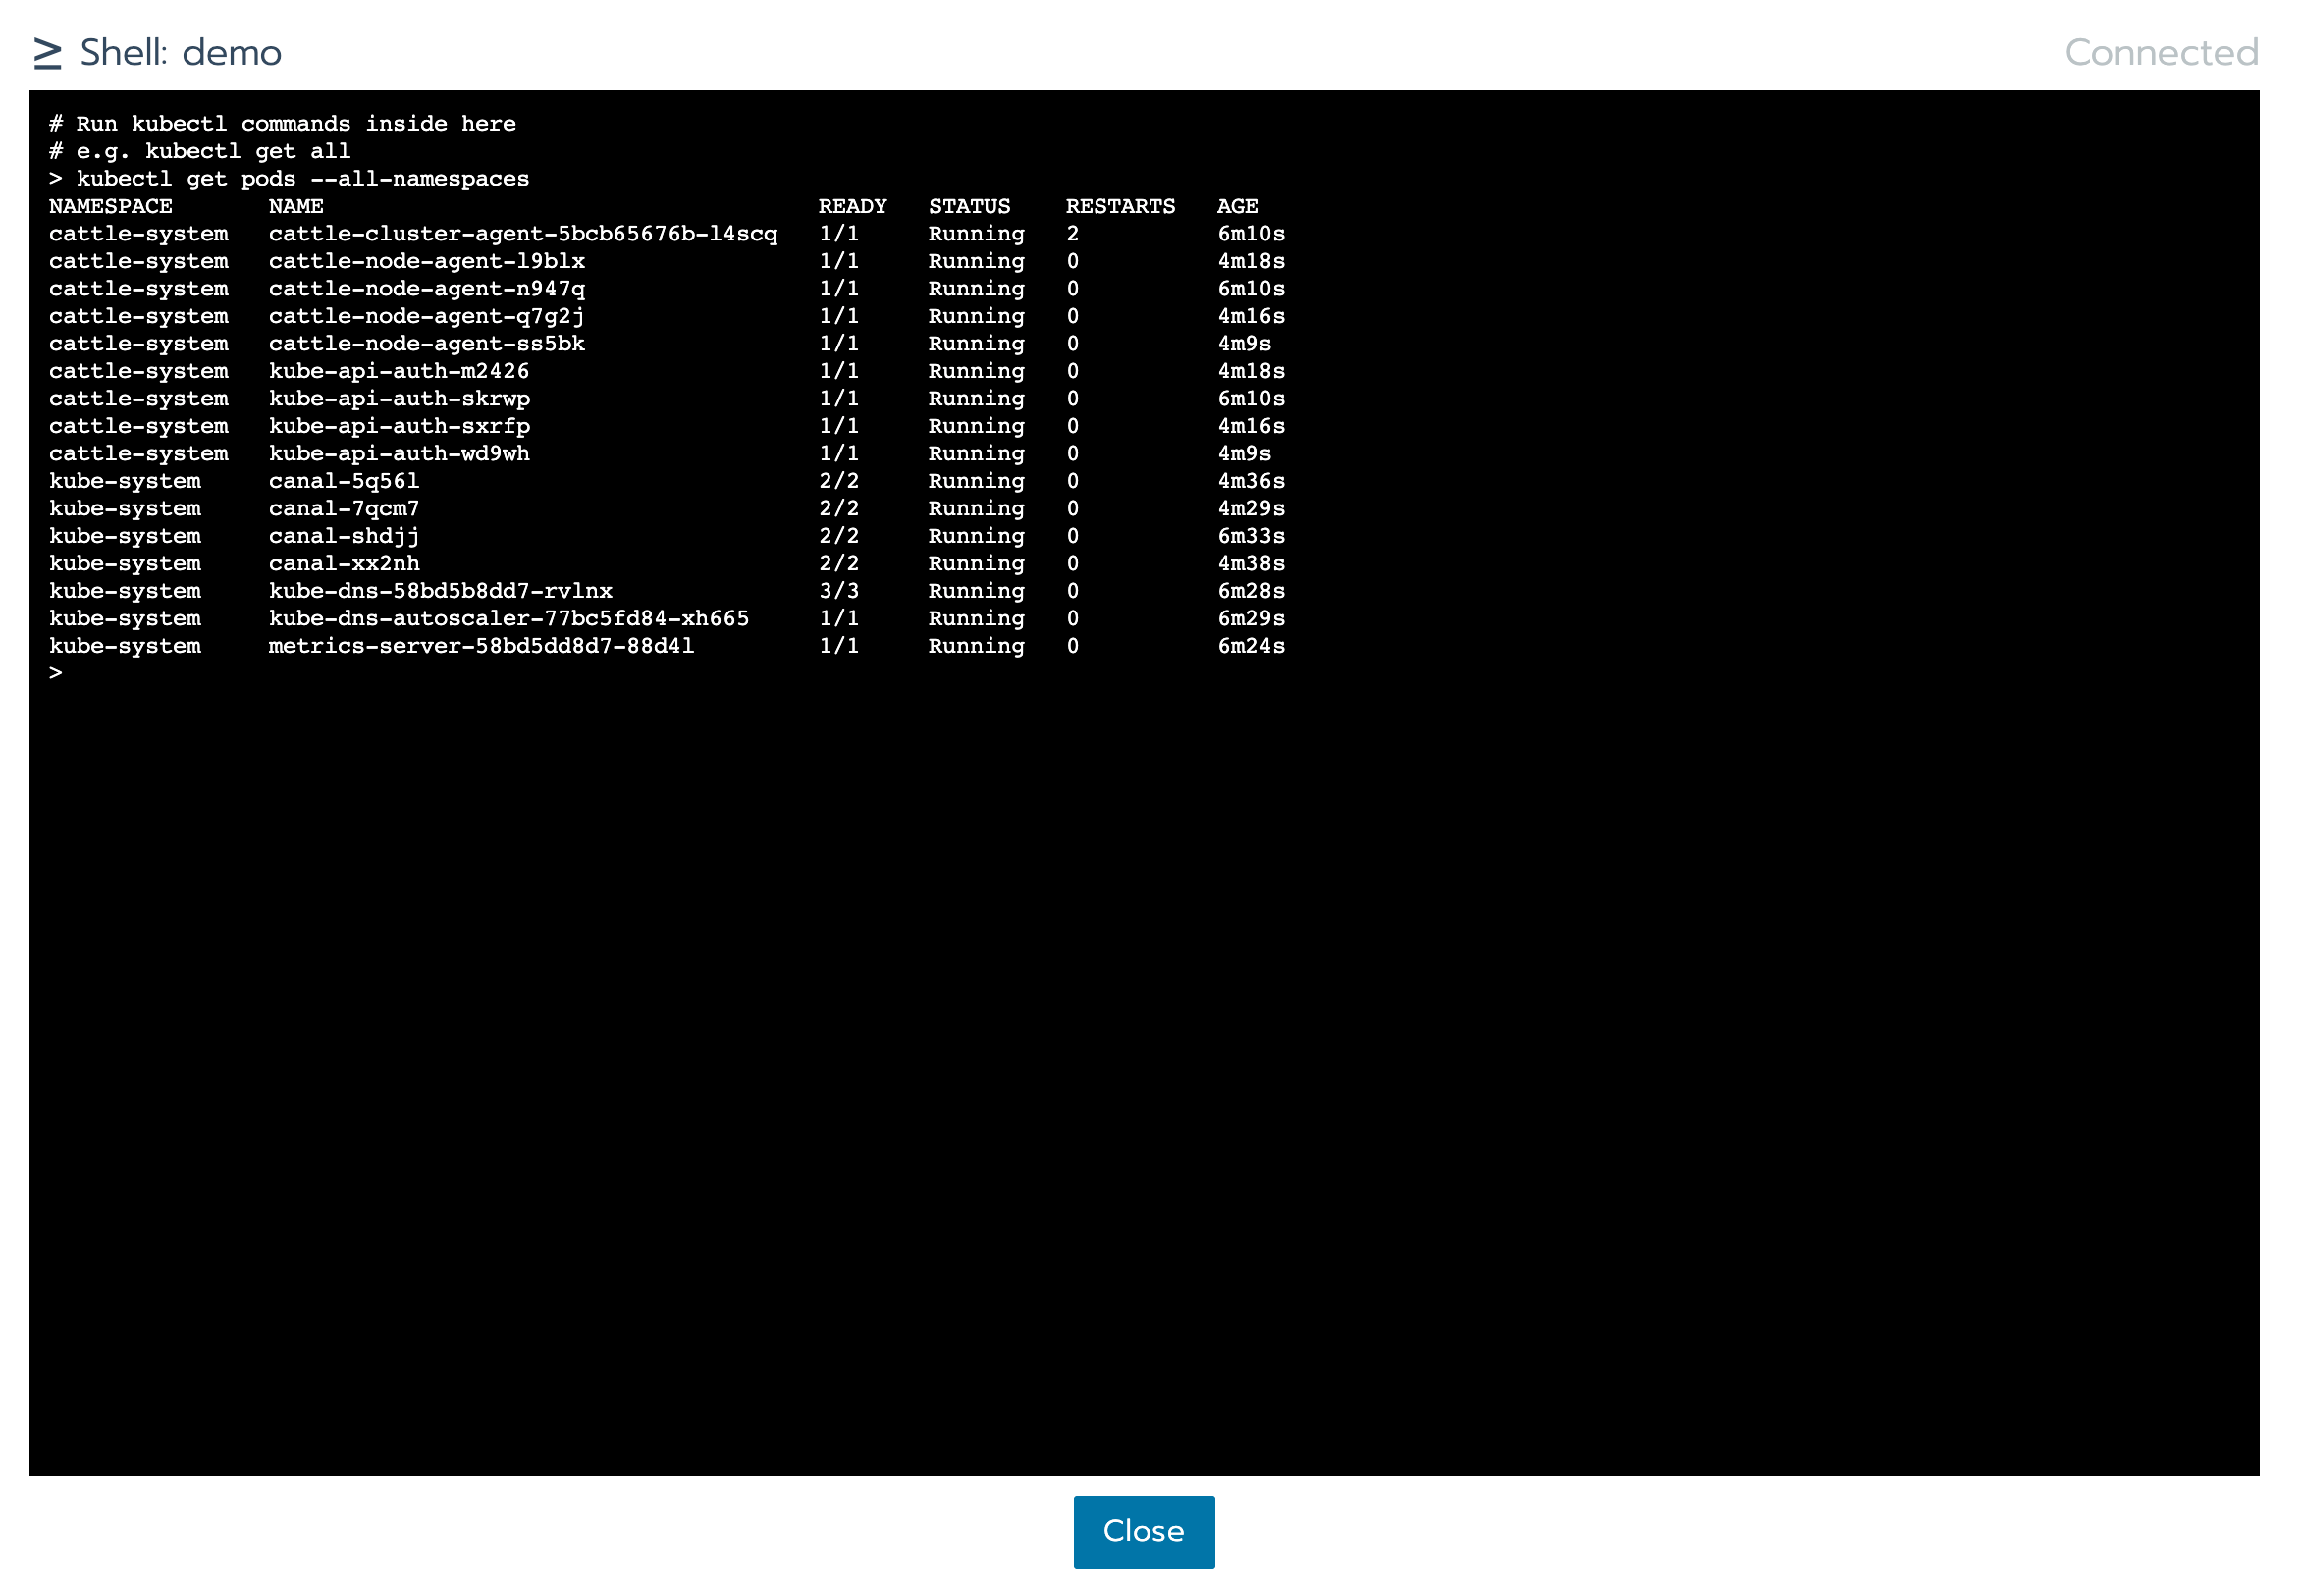
We can also access Kubectl via Rancher Web UI.

Enable Cluster Monitoring
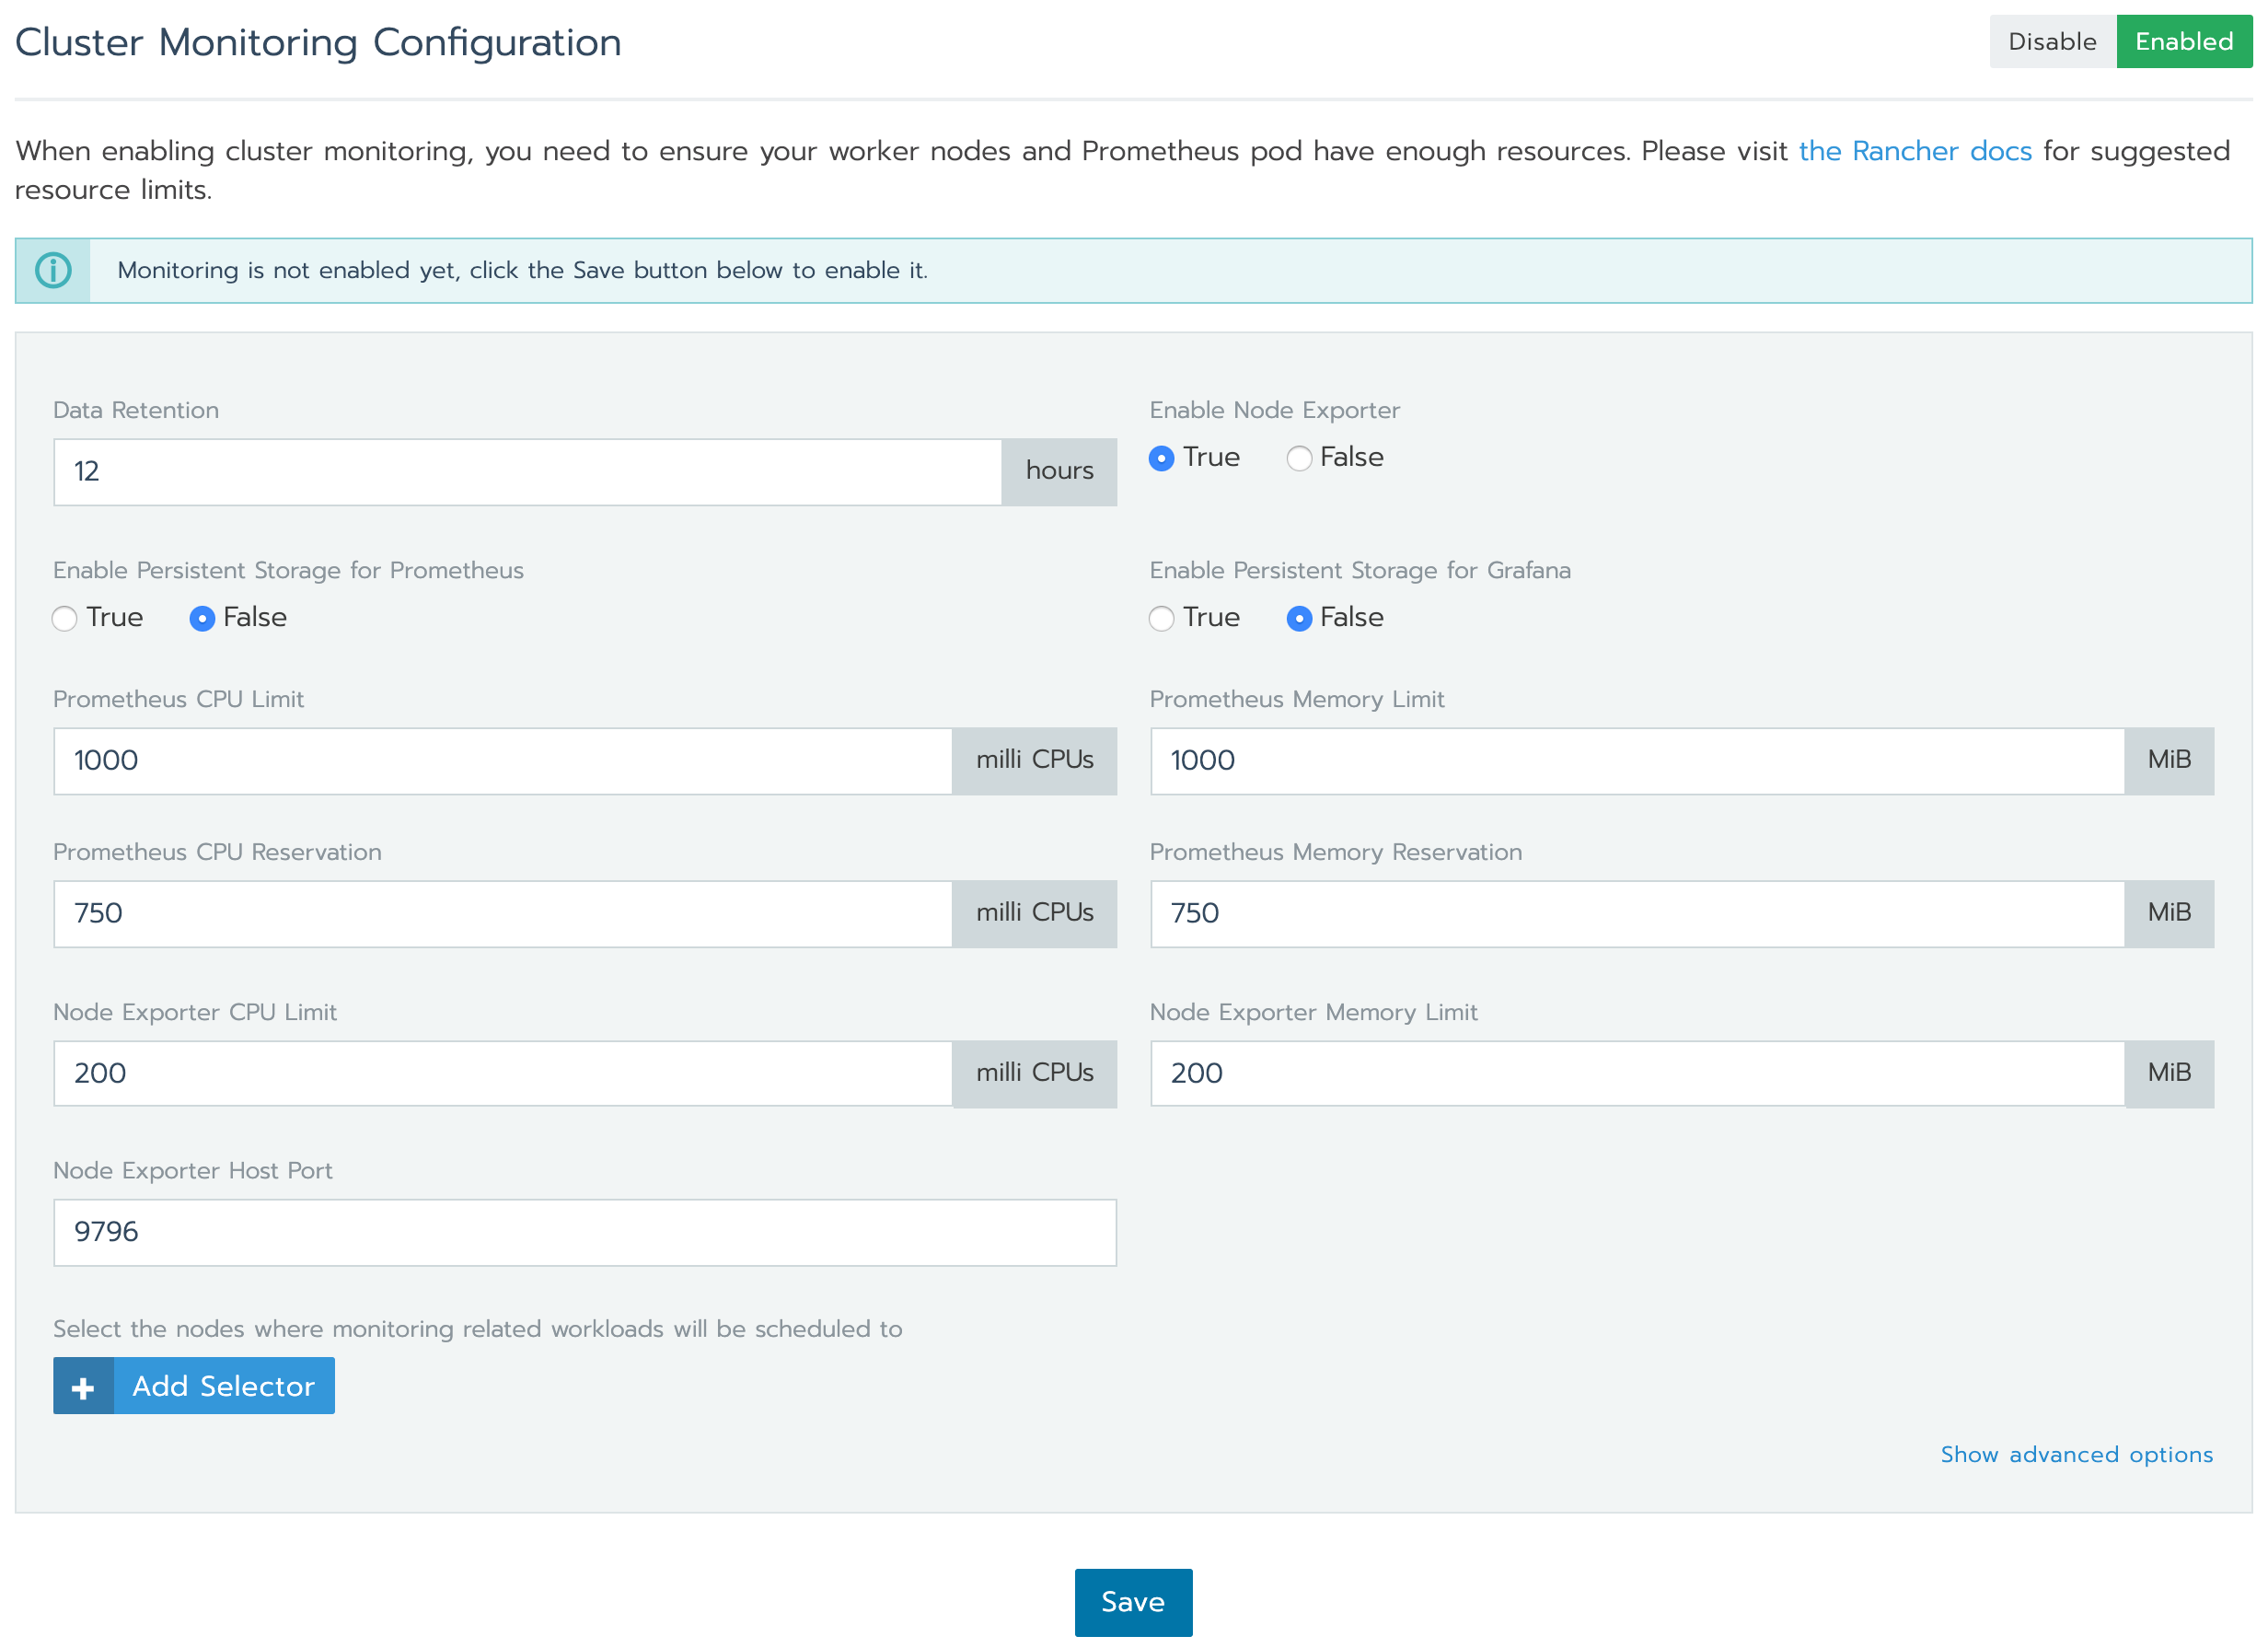
Rancher has a cluster monitoring feature built in. We can enable it in Rancher Cluster Dashboard. Click “Enable monitoring to see live metrics” and enable monitoring.

There’re a number of options we can adjust, like data retention for Prometheus, whether or not to use persistent storage for Prometheus and Grafana, and their memory and CPU request and limits.

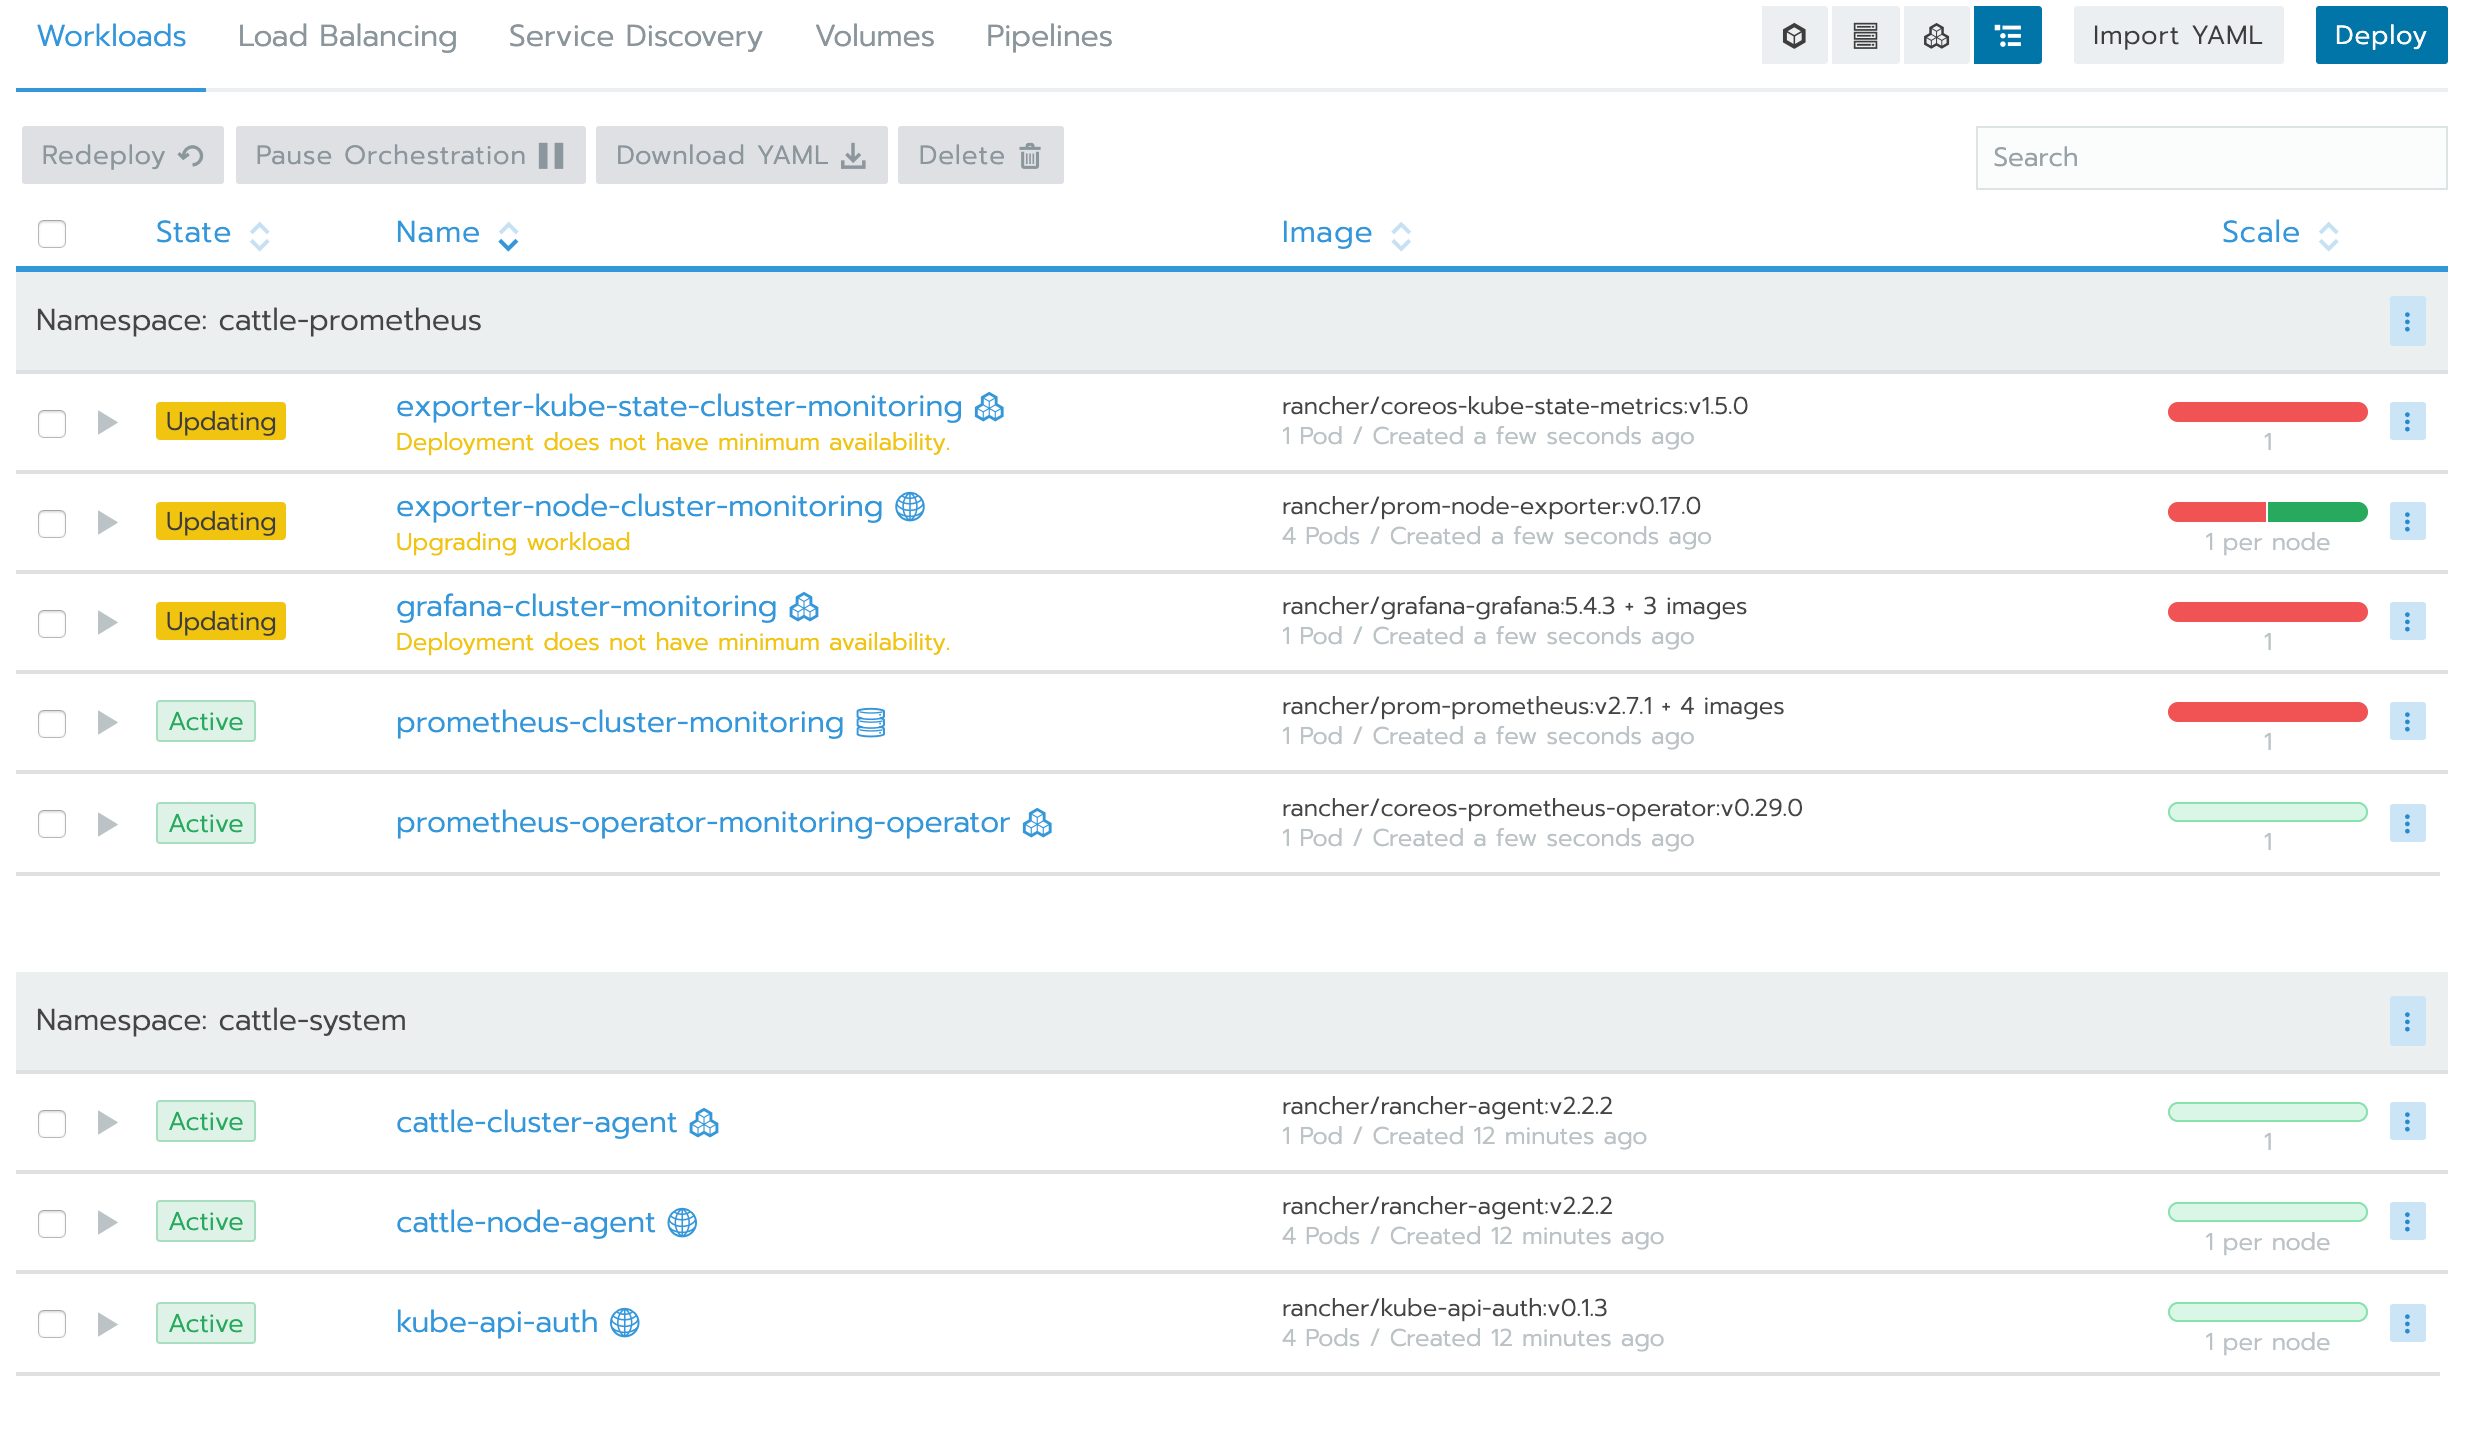
It will take a few minutes to enable cluster monitoring and we can monitor the deployment process with Kubectl or in Rancher Workloads Dashboard.

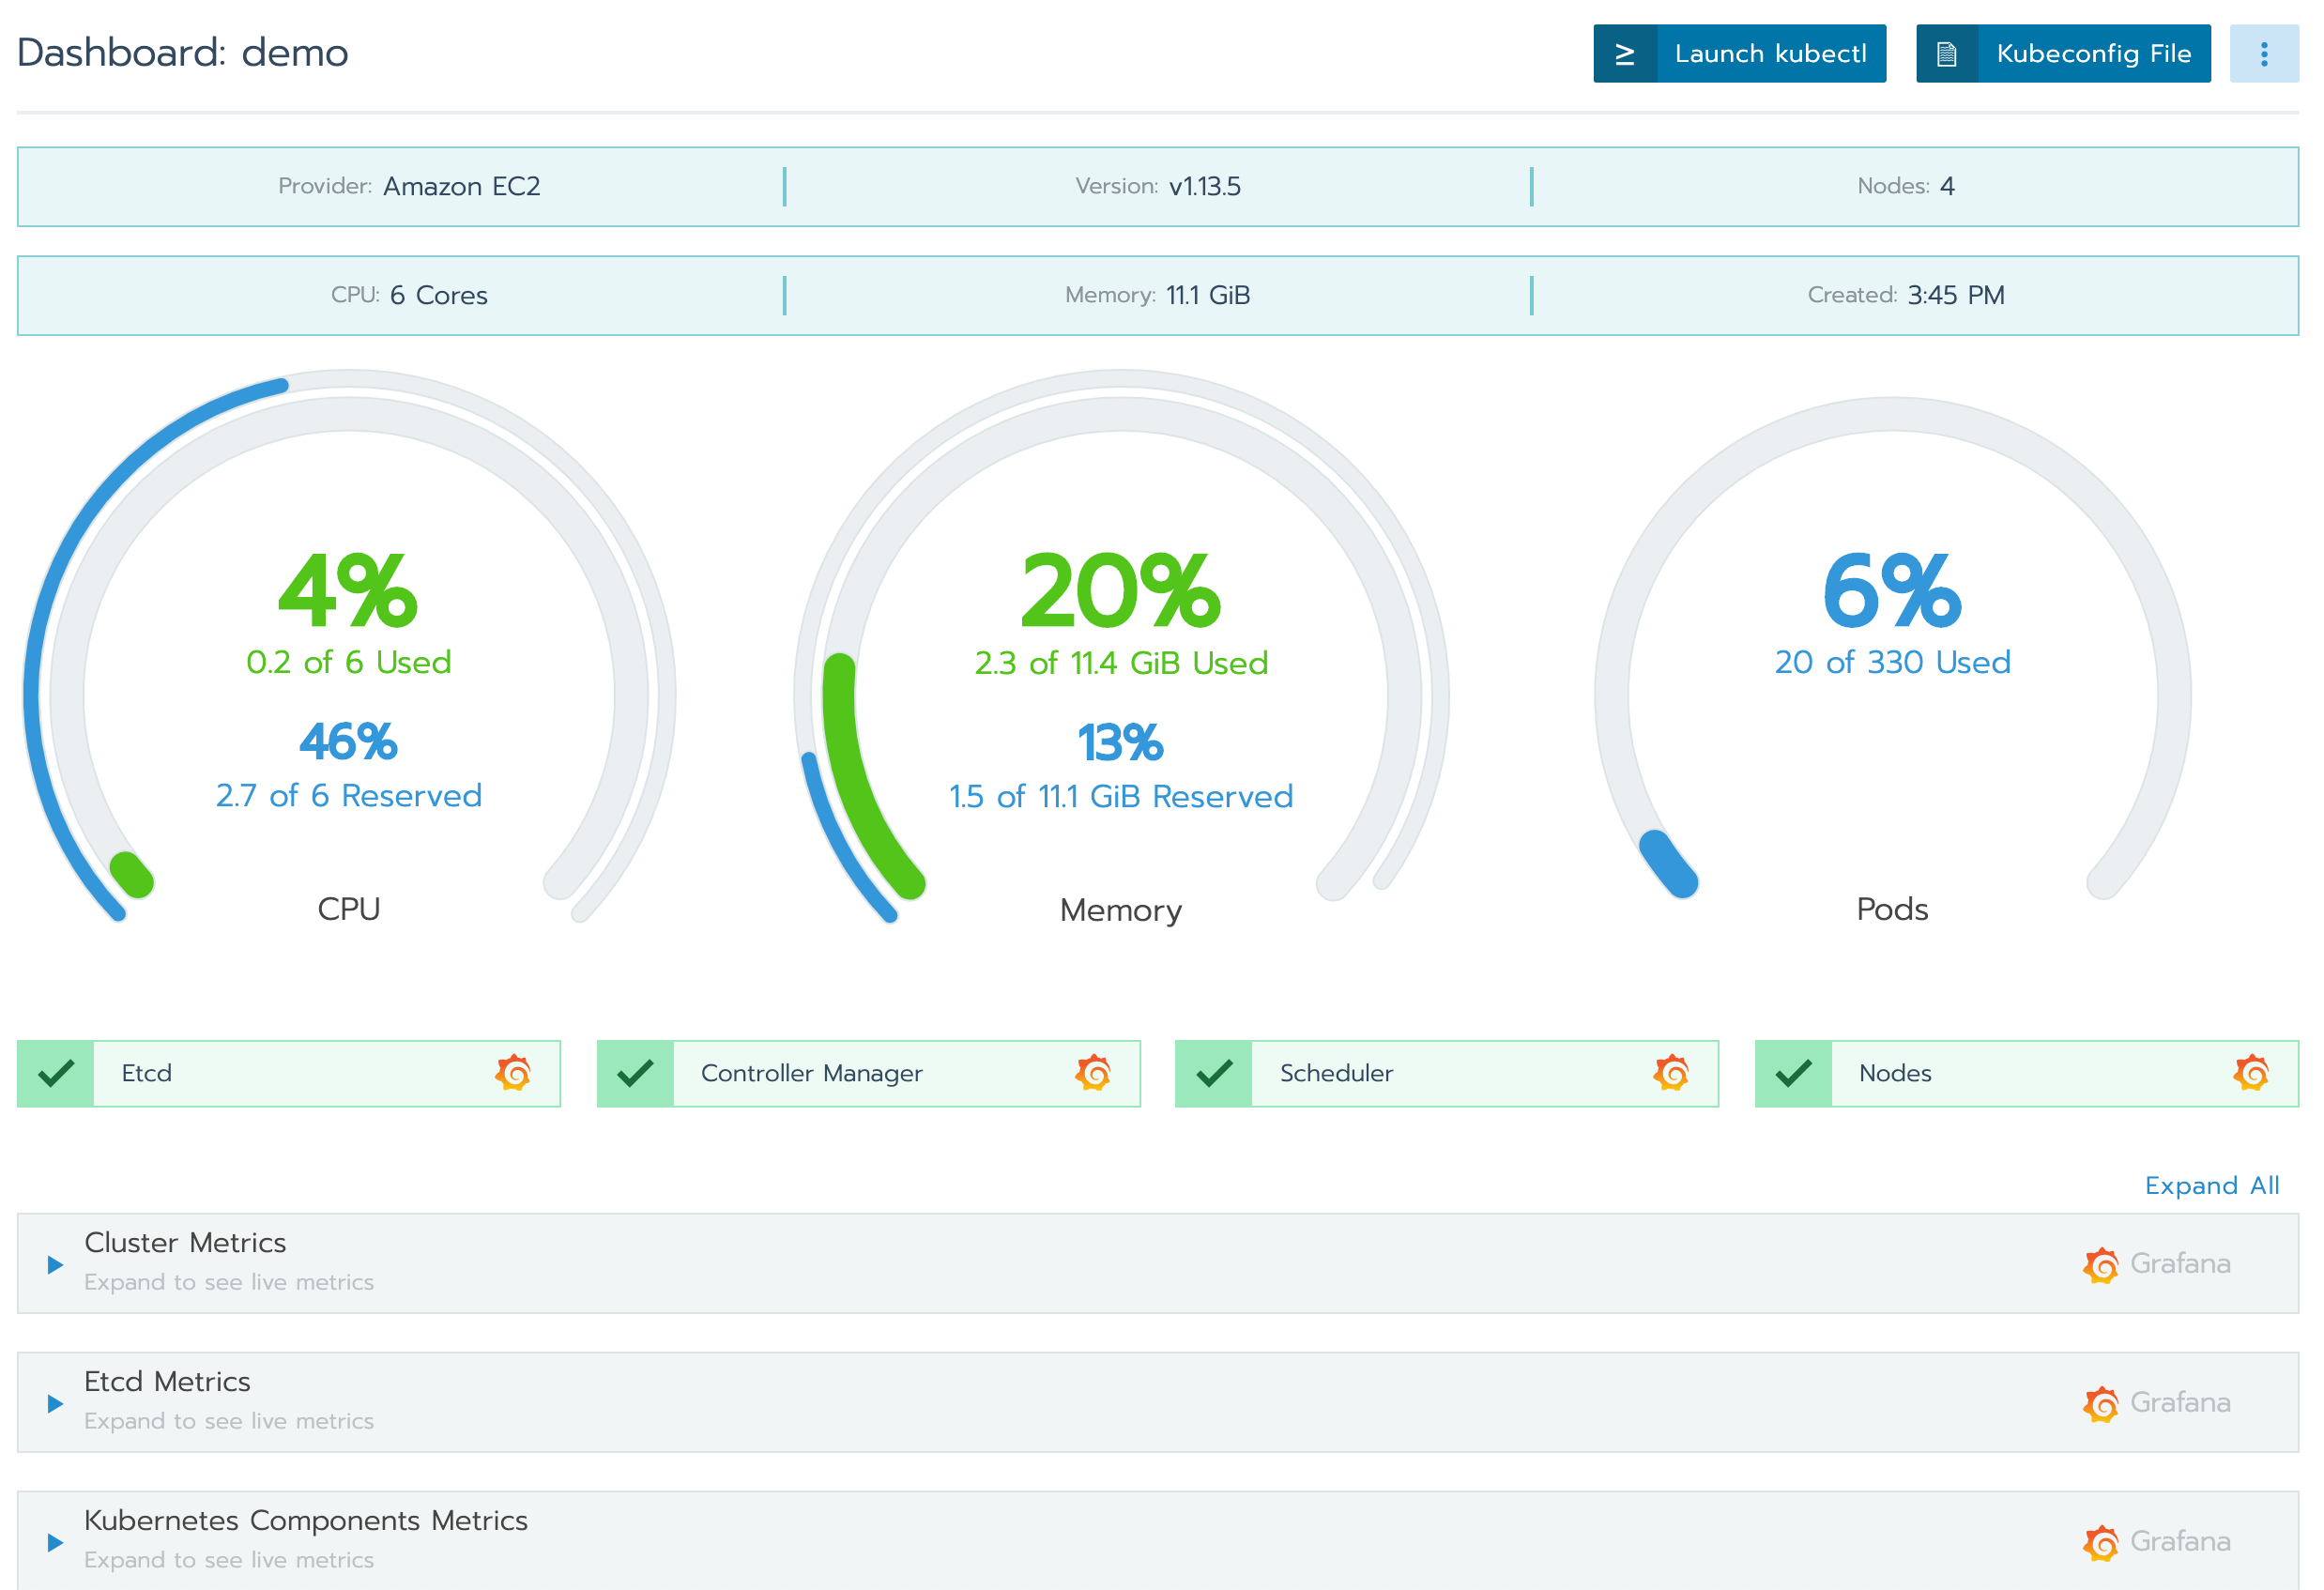
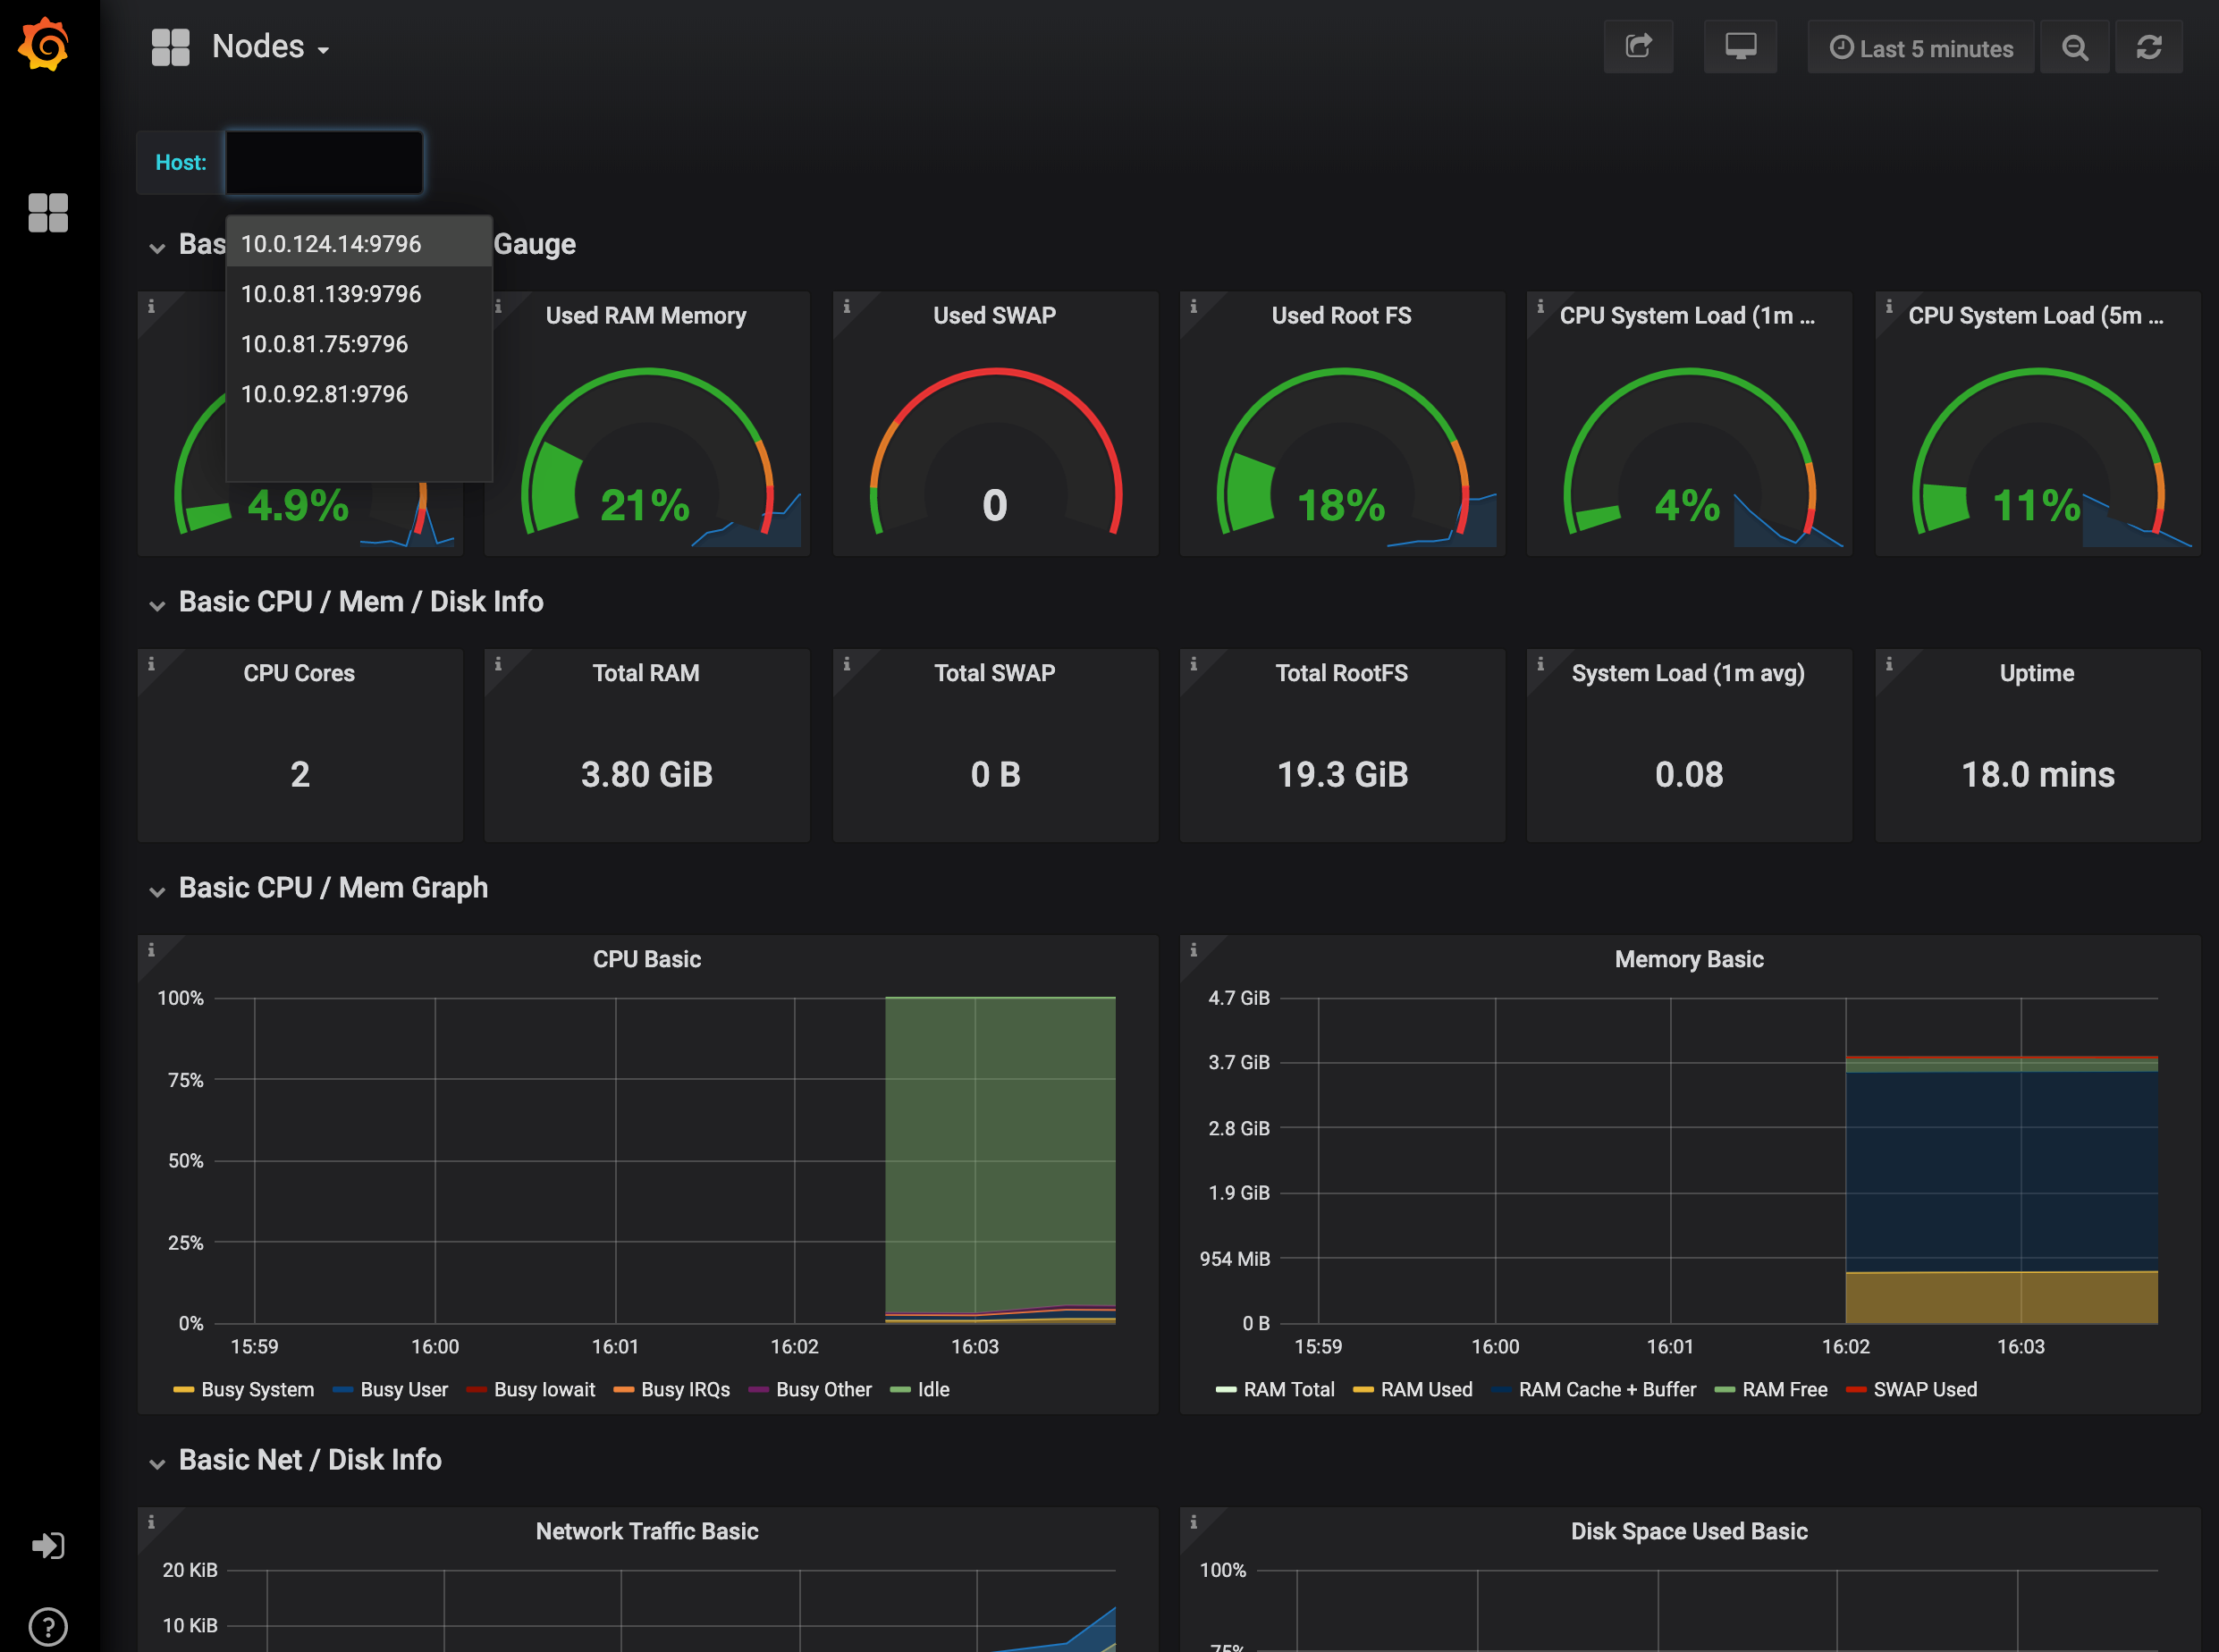
Once it got deployed, we can see the live metrics of our clusters, nodes, deployment and pods. If you couldn’t see the node metrics from all of your nodes, please make sure your node security group is allowing access to port 9796.


Conclusion
Deploying a Kuernetes Cluster with Cluster Monitoring is easy with Rancher. Not limited to Amazon EC2, It also allows us to deploy cluster to DigitalOcean, Google Cloud Platform, Azure, Linode, Packet, Openstack and vShpere.
It is not only a Kubernetes deployment tool but a powerful tool to monitor and manage Kubernetes workloads. It can replace the Kubernetes Dashboard and has built-in support for Roles Based Access Control.
One thing we would like to see in Rancher is the support of cluster autoscaling and spot instance auto draining. For those who are interested, there’s a Github issue regarding this.
In conclusion, we have been running a production Kubernetes Cluster with Rancher for the past few months. Overall we think that it is the best tool so far for our team in terms of Kubernetes deployment and workload management.
0 Comments